Deleted
Deleted Member
Posts: 0
|
Post by Deleted on Apr 2, 2016 19:38:36 GMT -5
UPDATE 3/15/16...Just to prove not everything goes as planned, after I completed the seat, it was driving me nuts that I realized that I had used the incorrect style of belts! (I used a cam-loc harness instead of the proper latch style harness) So thanks to my modeling buddies Jim Drew and Rick Ostman I decided to make a 2nd seat (from a spare AMT Watson kit) with upholstery like I did the 1st time and install the correct style seat belts and hardware I got from RB Productions. These belts are actually for US Navy WWII aircraft but are perfect for the 50's and early 60's Indy roadsters and other race cars of that era.  I began the process of upholstering the 2nd seat the same as the first seat I did previously. The RB Productions belts come with the photoeteched hardware and Beige belt material which I am going to use as patterns since the belts I want will be made with black paper. 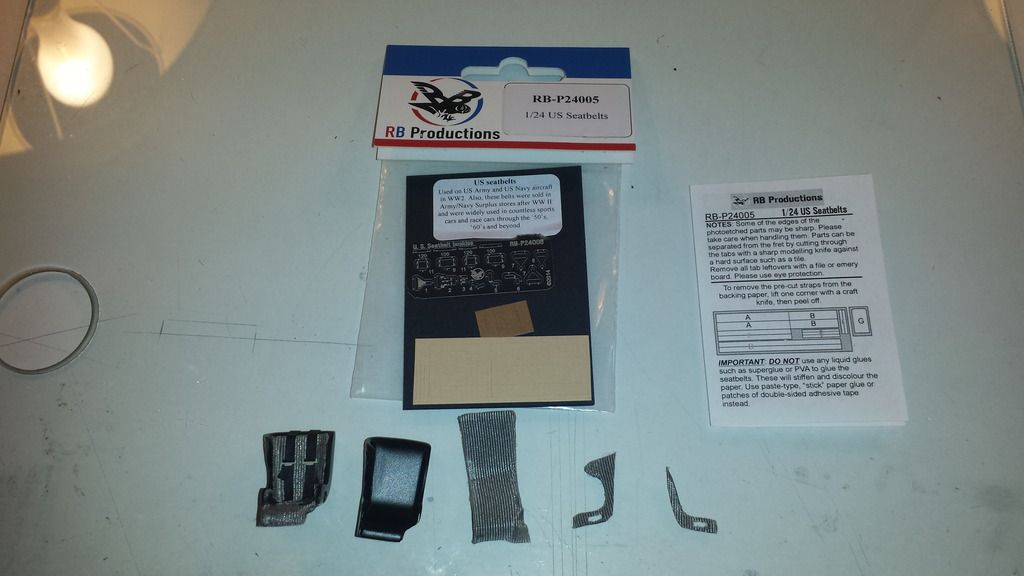
|
|
Deleted
Deleted Member
Posts: 0
|
Post by Deleted on Apr 2, 2016 19:40:56 GMT -5
Seat was upholstered, and I started out making the lap belts. 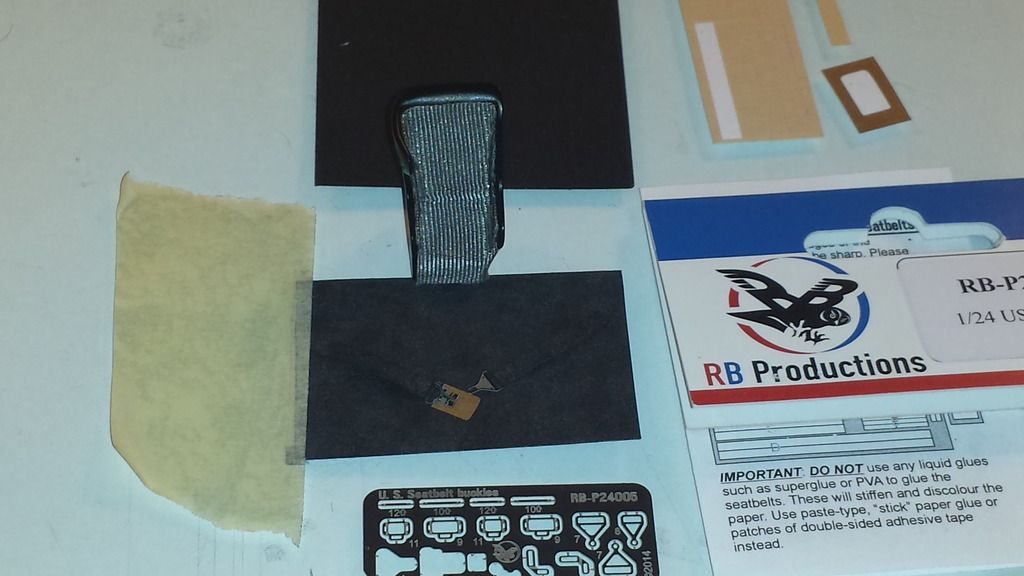 Close up... The lap belts are complete with correct latch and leather lap guard. 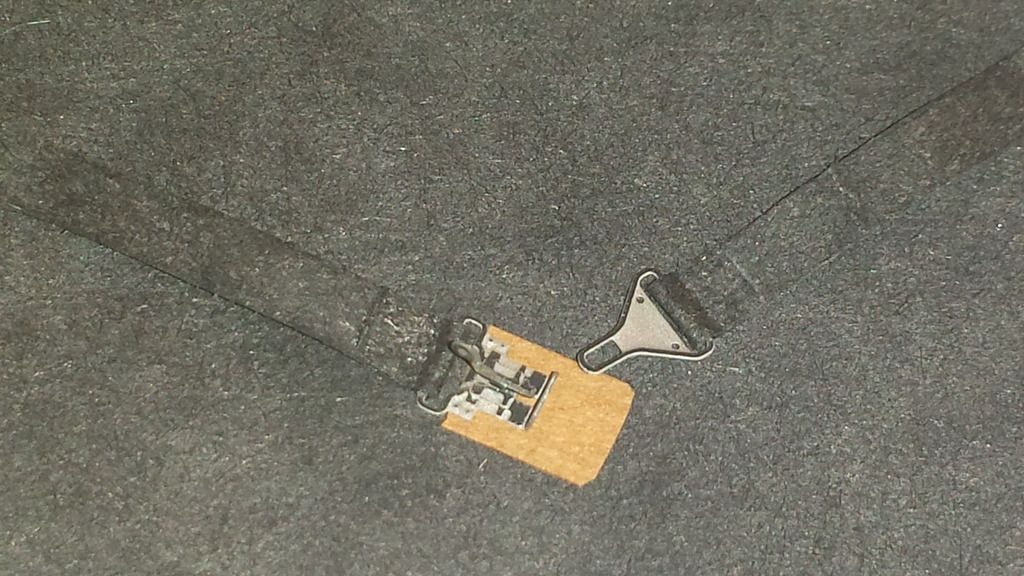 Attached to the 2nd seat they look great along with the shoulder harnesses . 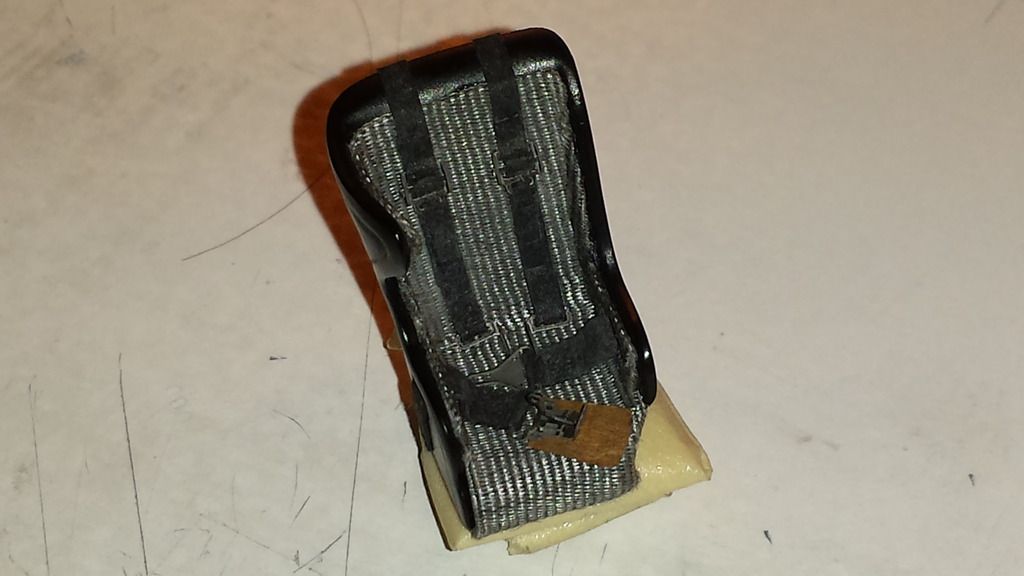 Another view of the completed seat.  |
|
Deleted
Deleted Member
Posts: 0
|
Post by Deleted on Apr 2, 2016 19:42:27 GMT -5
As compared to the 1st seat this 2nd seat has the look I am going after. 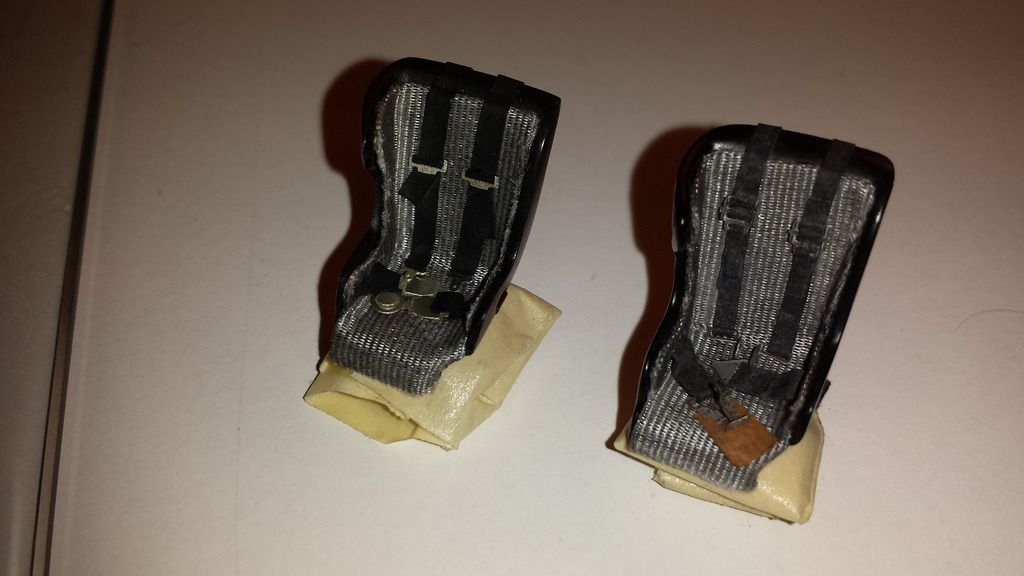 Mocked up the seat in the car.. 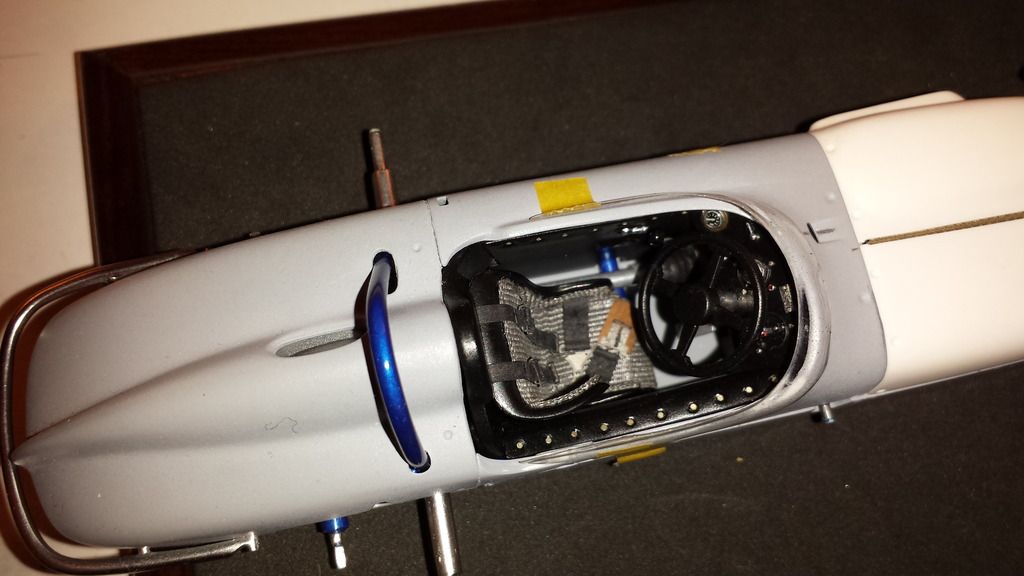 These belts are closer to what the real car would have of used during 1963.. 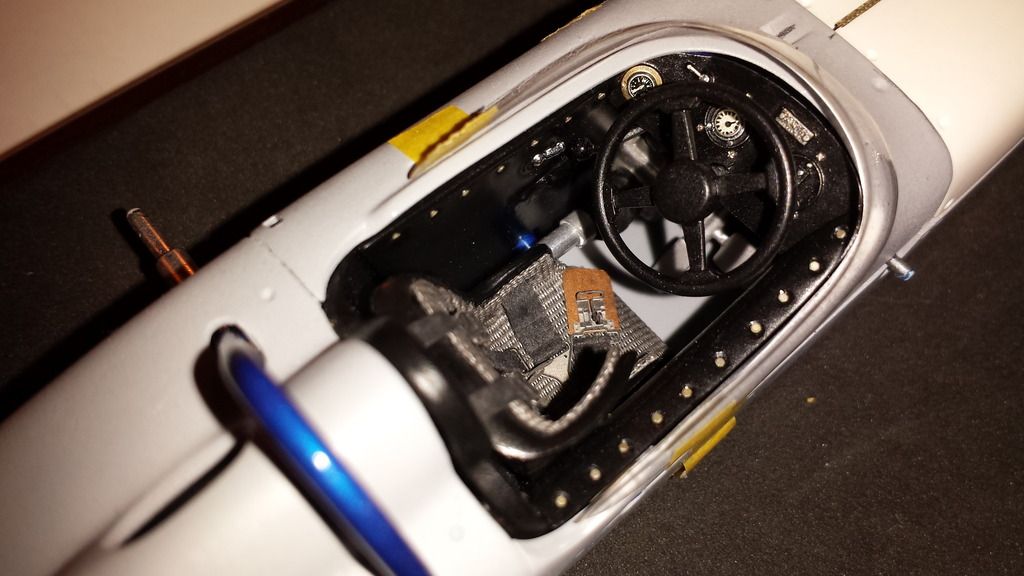 I'm happy now.. On to other items like vacuforming a windshield that fits correctly. 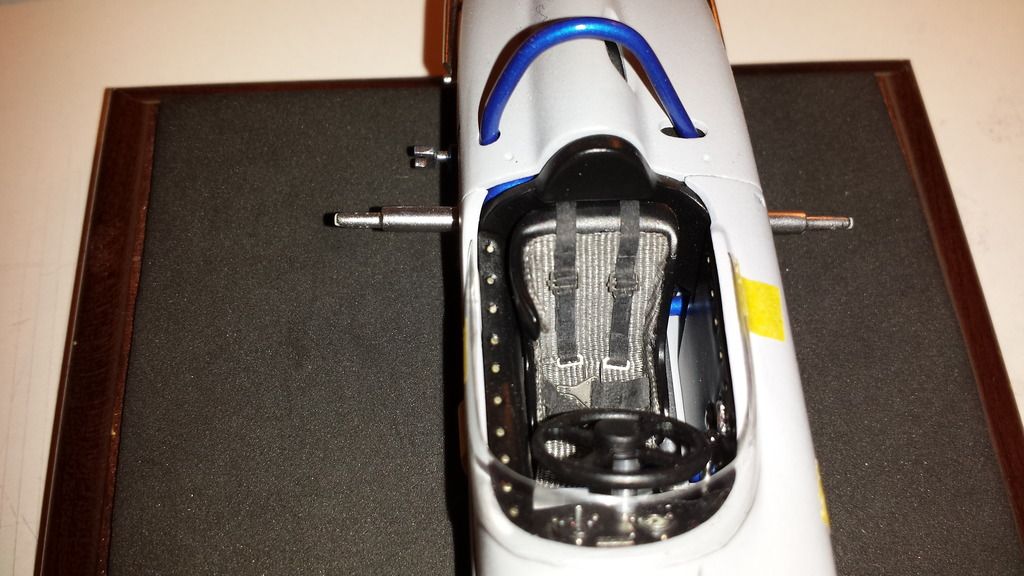 |
|
Deleted
Deleted Member
Posts: 0
|
Post by Deleted on Apr 2, 2016 19:43:53 GMT -5
(Update 3/28/16)Did some more work this past week. Corrected the side pods.on the nosecone to look more realistic. Created a mold and vacuum formed a new windshield. Added a finishing interior trim panel for the interior... Before creating a new windshield I decided to address another issue that I did not like on the nosecone more specifically the side pods covers of the suspension. If you look on this photo of the real car the side pods are screwed into the nosecone and have an l shaped lip to attach to the nosecone. This is the area in going to fix. 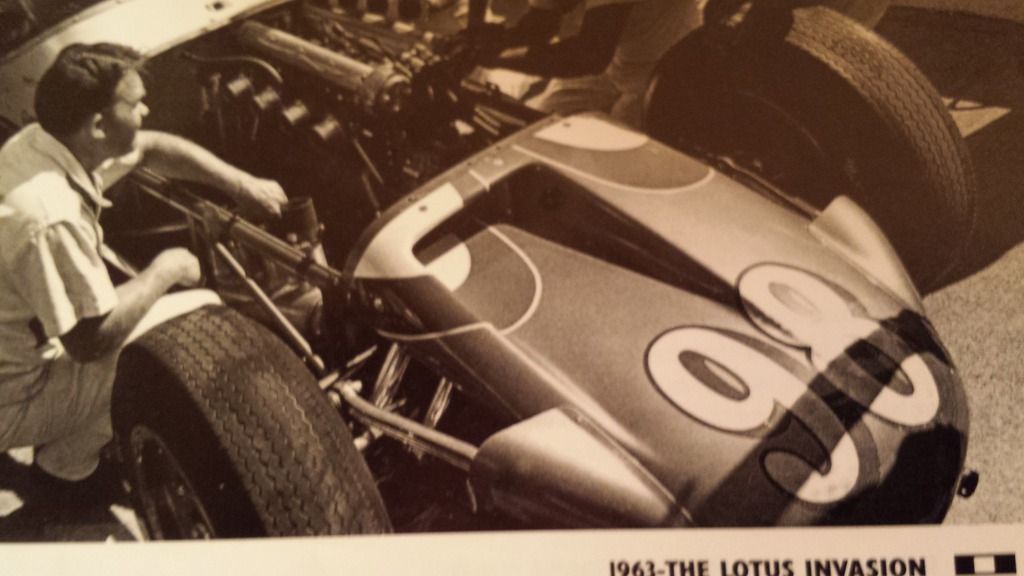 Notice on this earlier picture of the nosecone the side pods have a grove distinguishing where they attach. It just doesn't' look right to me...On to the fix... 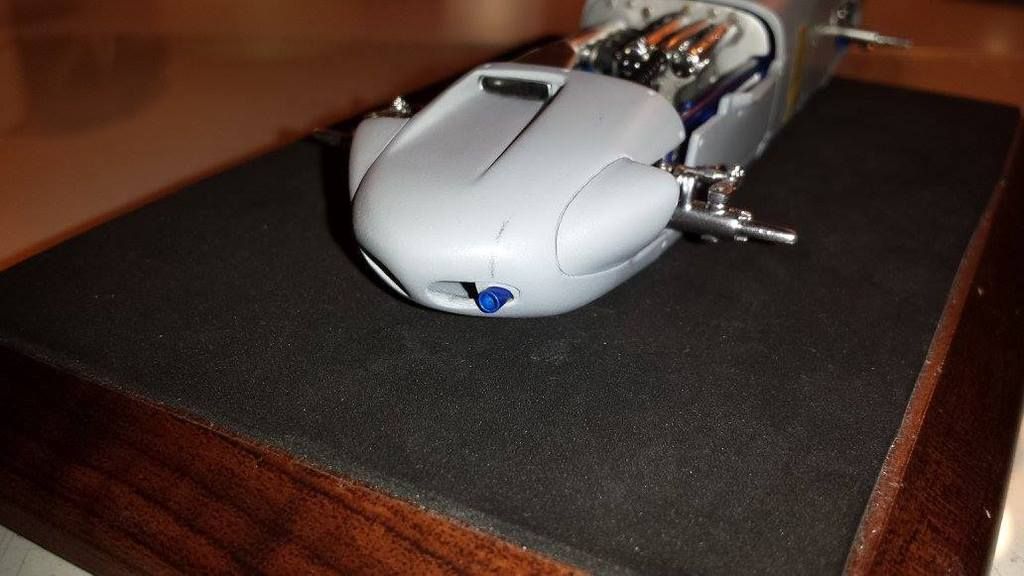 I fill in the groves on the side pods. 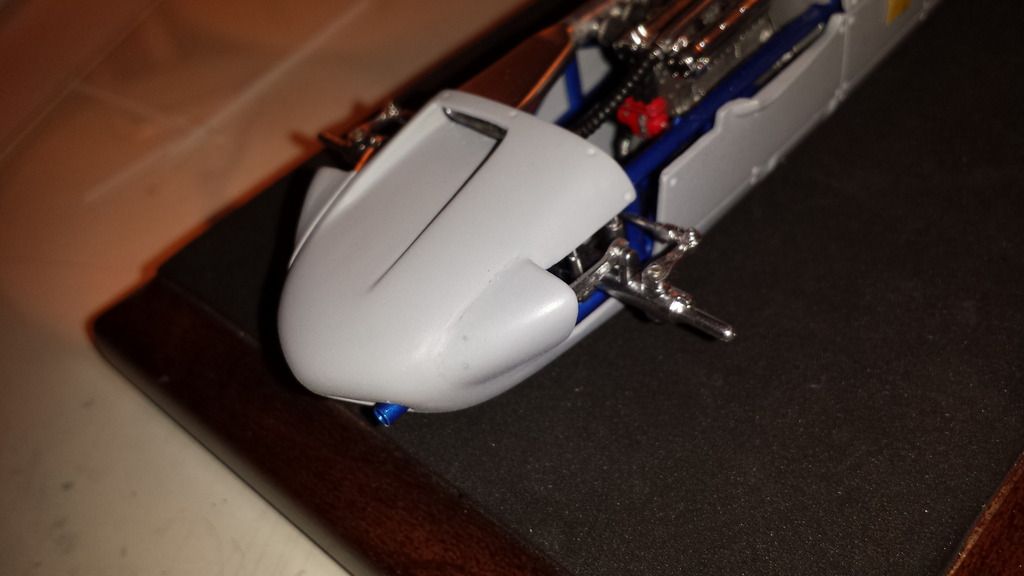 Then with some help of some .010 strip styrene and some slow setting CA glue.. I start the rebuild of the side pods.. 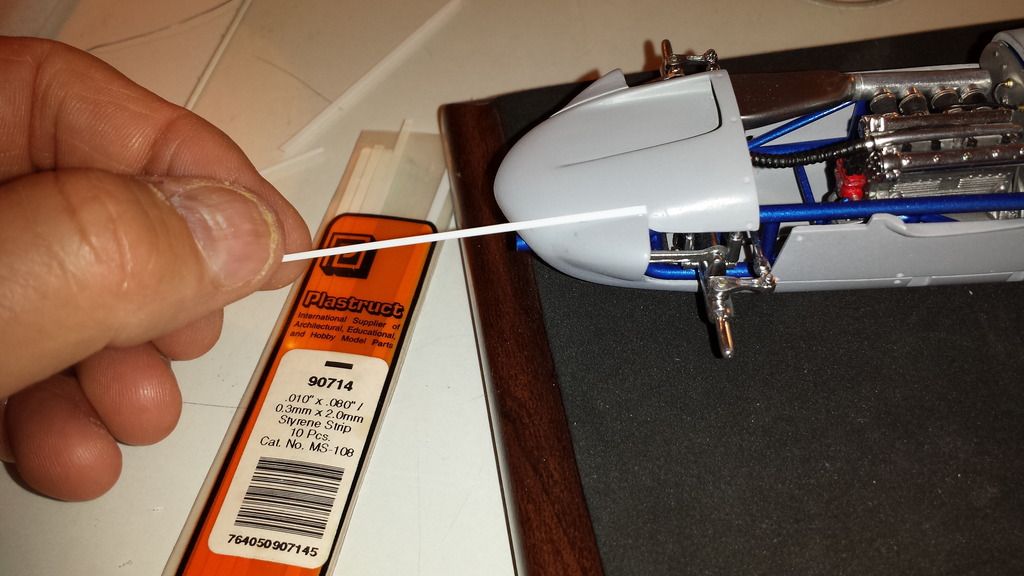 Carefully looping the strip styrene around the pods..I'll fill the gaps with some slow setting CA glue and lots of sanding.. 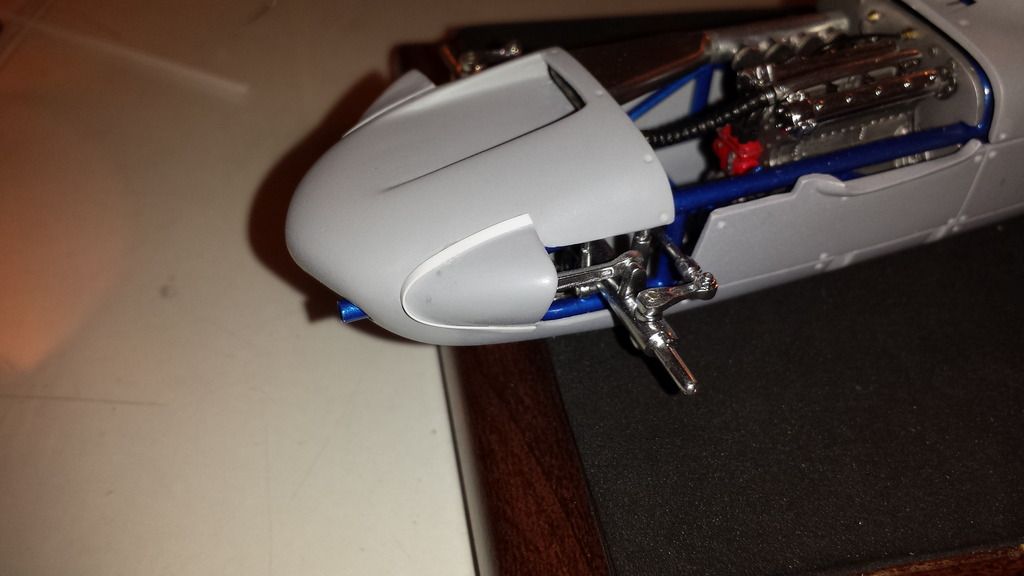
|
|
Deleted
Deleted Member
Posts: 0
|
Post by Deleted on Apr 2, 2016 19:48:10 GMT -5
Sand to shape 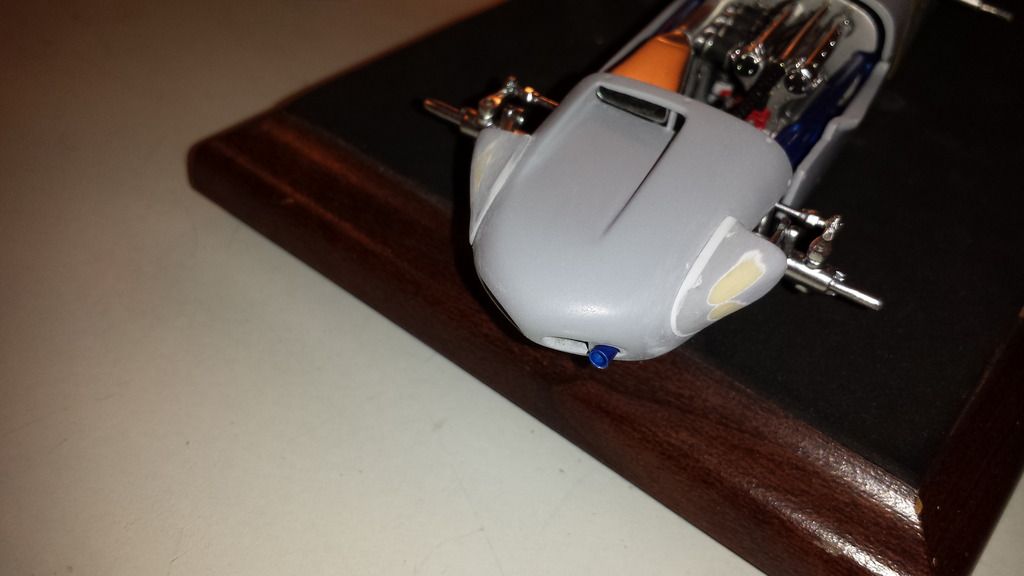 After some primer the effect I'm looking for is taking shape. More filling and sanding is required....  With a small pin vise hand drill. I drill 3 holes to represent the attachment points of the side pods with some Scale Hardware .7 MM stainless Phillips head screws. 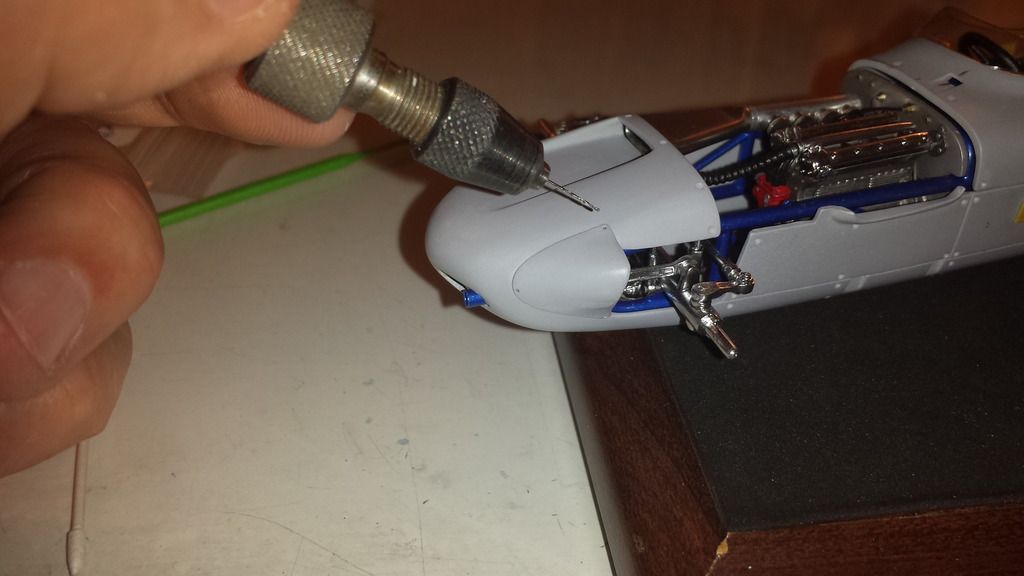 The .7 mm Phillips head screw are mocked into the holes.. This looks much better! 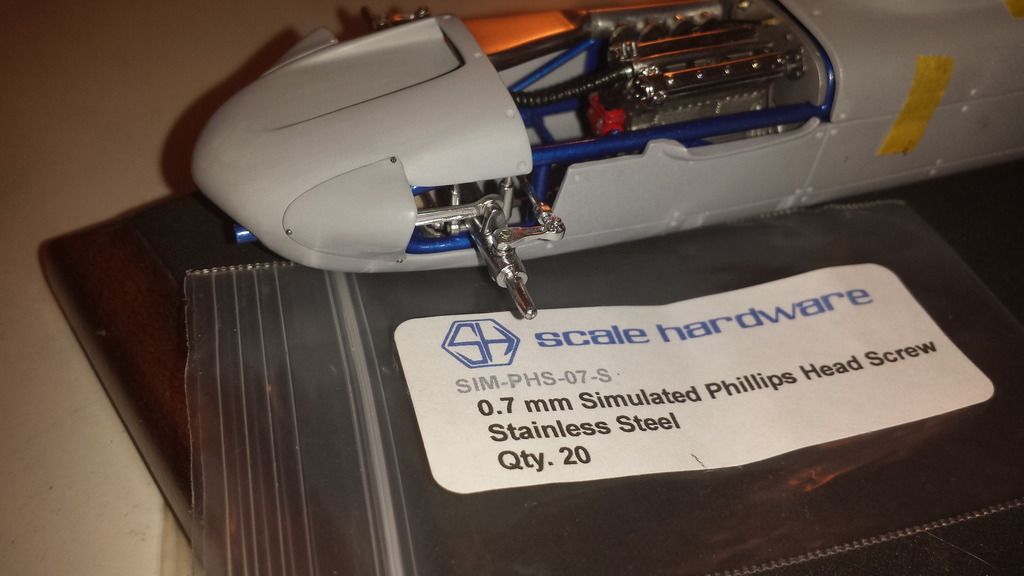 |
|
Deleted
Deleted Member
Posts: 0
|
Post by Deleted on Apr 2, 2016 19:48:52 GMT -5
Now on to creating a new windshield. One of the big problems with this kit is the out of scale way too thick windshield. Notice how thick and bulky the kit windshield is. Also notice how it lays on to on the interior openings edge which is all wrong and just looks terrible. 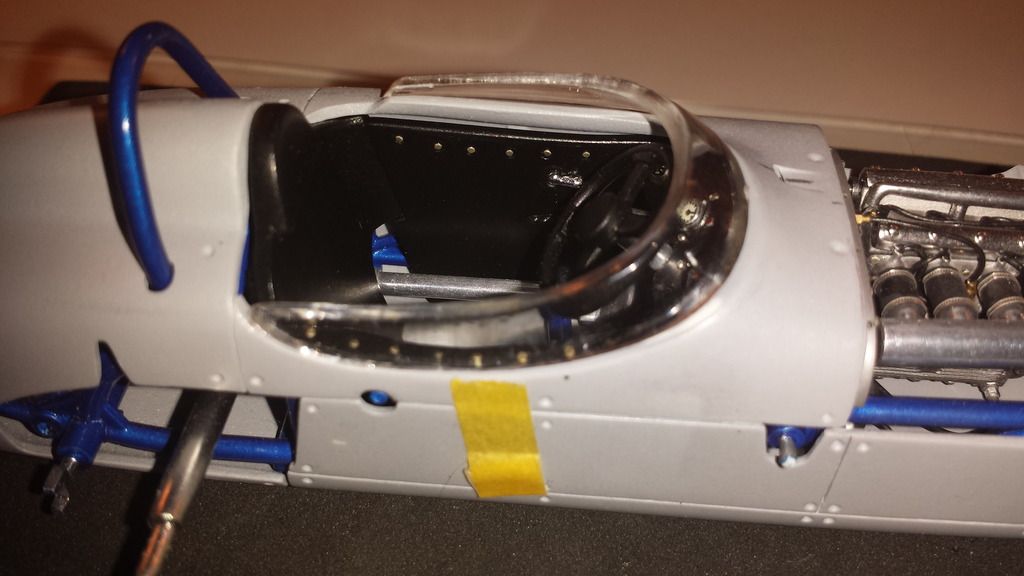 The other side of the kit windshield. Notice how it is same length as the interior opening. 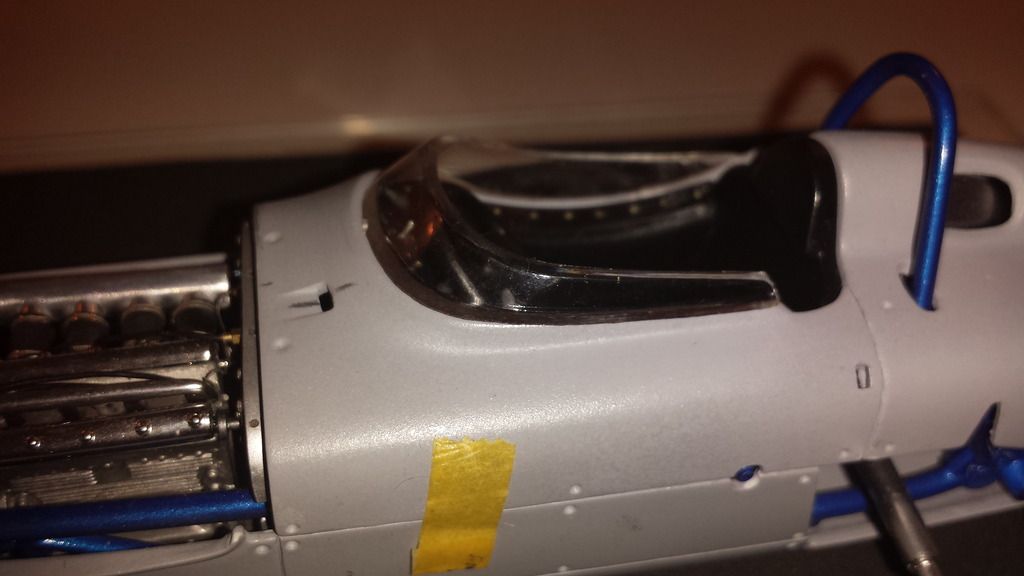 Indycals makes a nice vacuumed formed replacement windshield which is formed with very thin clear plastic. But the only problem I found with it is it is not quite long enough when it is mocked in place in the correct attachment method.(The Windshield should layer over the interior opening edge slightly instead of on top of it I can correct this but it will require me to make a custom vacuum formed windshield. 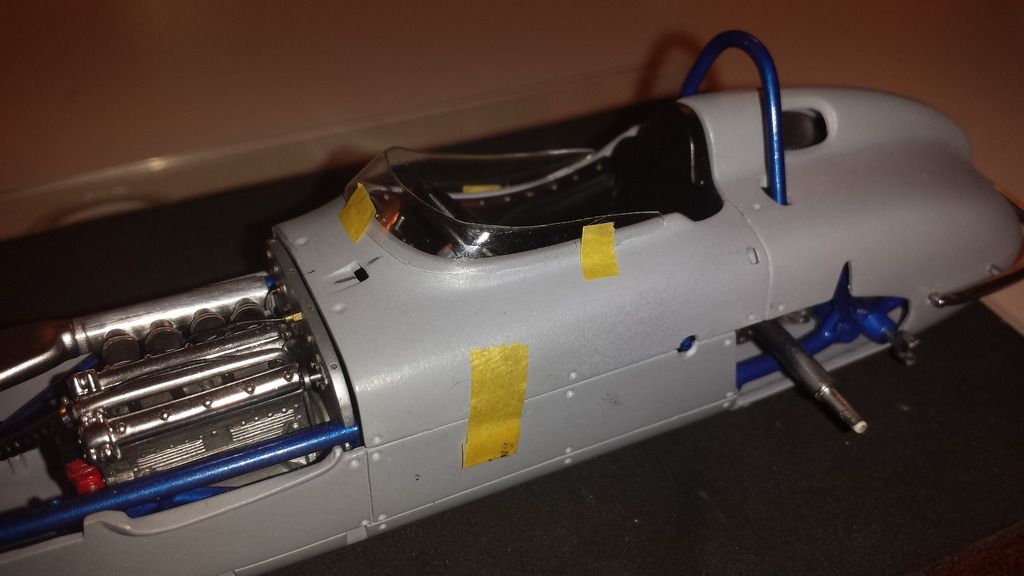 To make a new windshield I have to make a mold to form the new windshield that is slightly longer then the Indycals windshield. Luckily, I have several extra kit windshields to work with.. So with some cutting, glue and a lot of sanding I'm able to make a windshield that is slightly longer.. 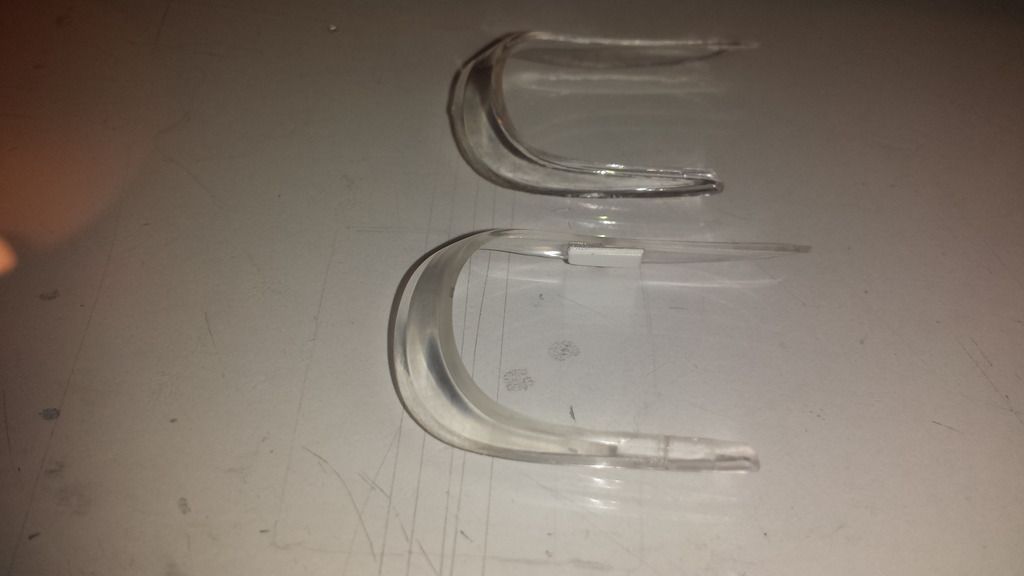 |
|
Deleted
Deleted Member
Posts: 0
|
Post by Deleted on Apr 2, 2016 19:49:23 GMT -5
I added some structure to support the windshield so it won't flex. I used the primer to make sure the windshield was smooth. I however learned in my first couple of mold attempts that this does not work so well (the primer would stick to the plastic part I was molding ) so I removed the primer and polished the heck out of the bare windshield surface.. (I'm learning how to vacuum form parts so i'll make mistakes)  I added some Milliput 2 part putty to the raise the structure and when dried I drilled some holes in the mold so the vacuum from the forming machine can pull the heated plastic over the mold. 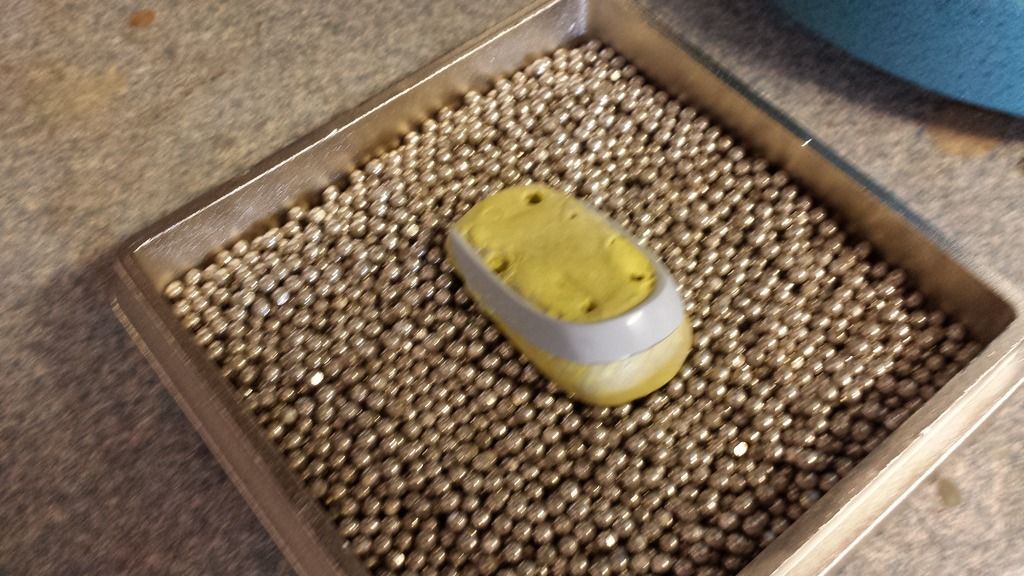 Here is the vacuum forming machine I am using from Micro Mark.(About $110 though Amazon) . A nice Christmas present I received I might add! OK for those not familiar with these machines. The plastic is put into the rack above, held in place with the latch.then the plastic is heated from the heating element above for about 30 seconds to 1 minute (depending on the thickness of the plastic). The part you are molding is placed in the tray below and once the plastic is sufficiently heated...You turn on a vacuum on the lower tray below the part and then the heated plastic is dropped on the lower tray where the vacuum sucks the heated plastic over the mold.. 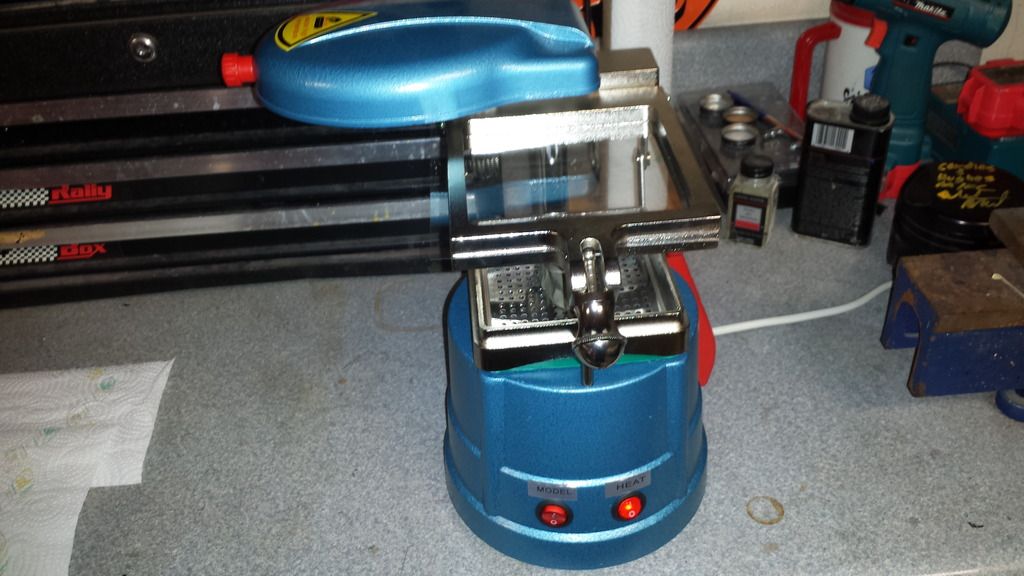 |
|
Deleted
Deleted Member
Posts: 0
|
Post by Deleted on Apr 2, 2016 19:50:02 GMT -5
The Newly molded windshield after it came out of the machine (BTW it took me 6 attempts to get this right because of my screw up's!) 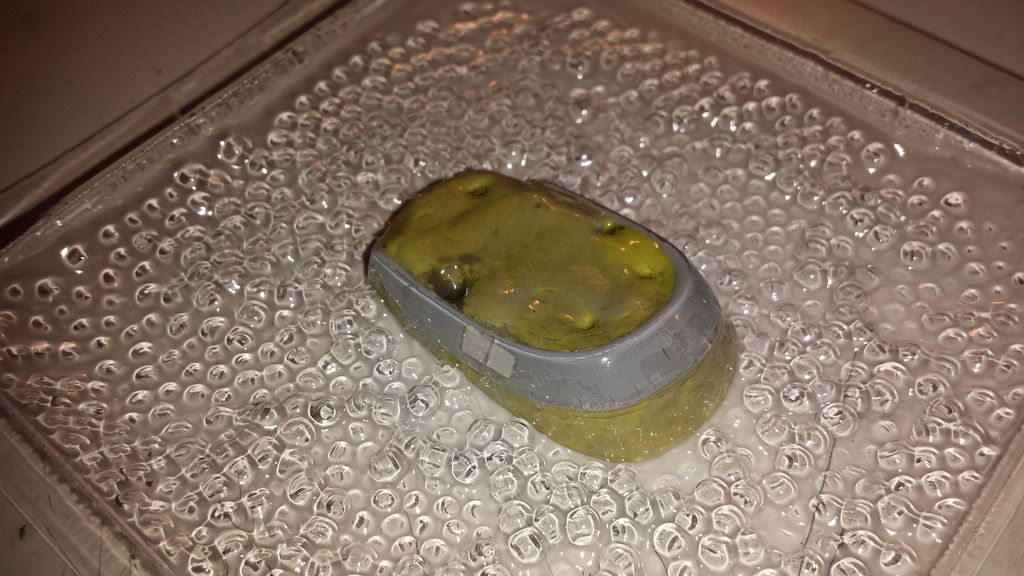 Newly created windshield fits properly now.. 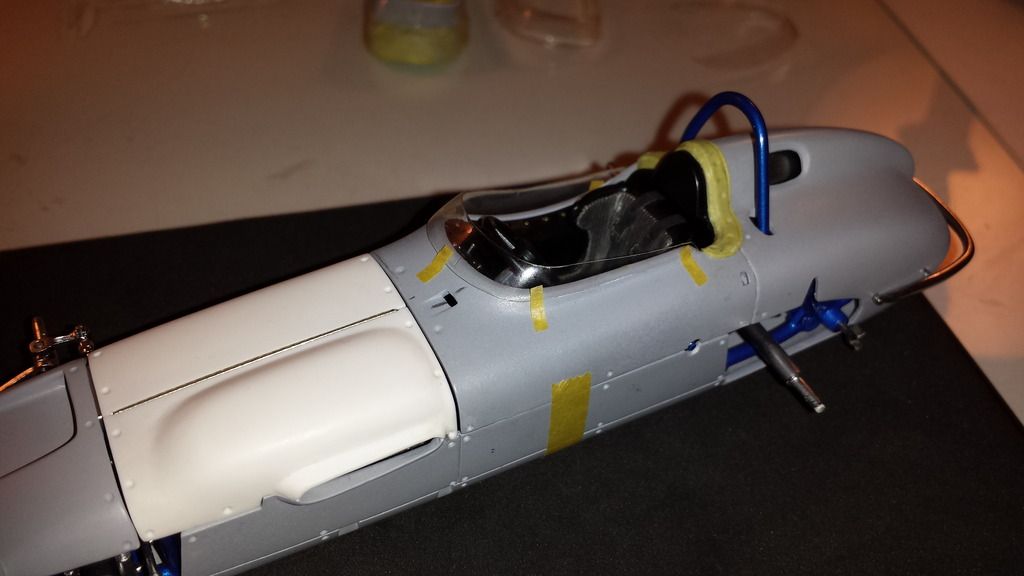 Other Side.. 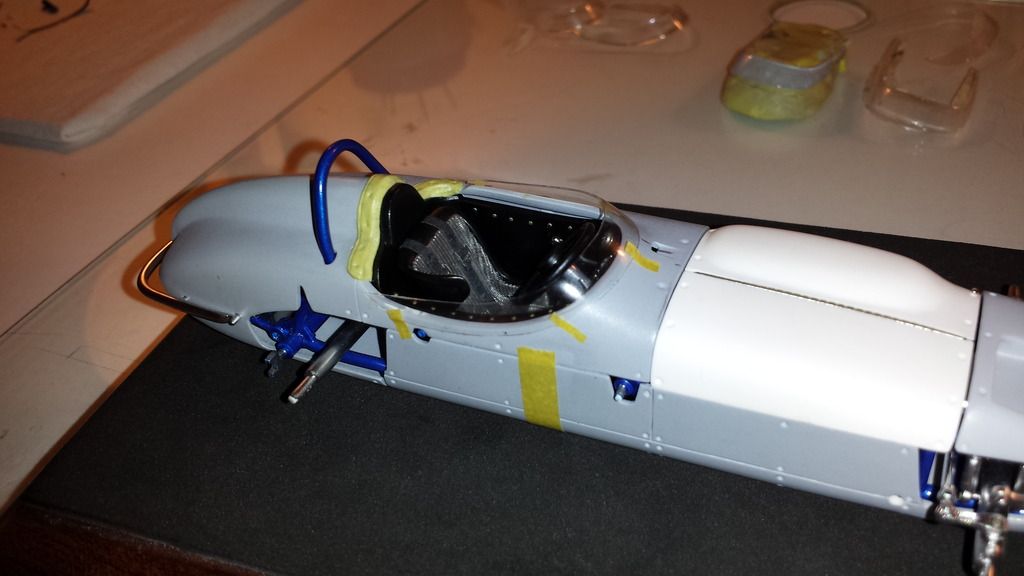 |
|
Deleted
Deleted Member
Posts: 0
|
Post by Deleted on Apr 2, 2016 19:50:31 GMT -5
I also needed to make a interior finishing trim panel. Originally, I was going to used lead sheet but found it did not work so well (difficult to manipulate it to the shape i wanted).. So instead I decided to use some Milliput 2 part sculpting putty. I was able to get the approximate shape I wanted. Lots of sanding is needed to get it to a thickness and shape I like. 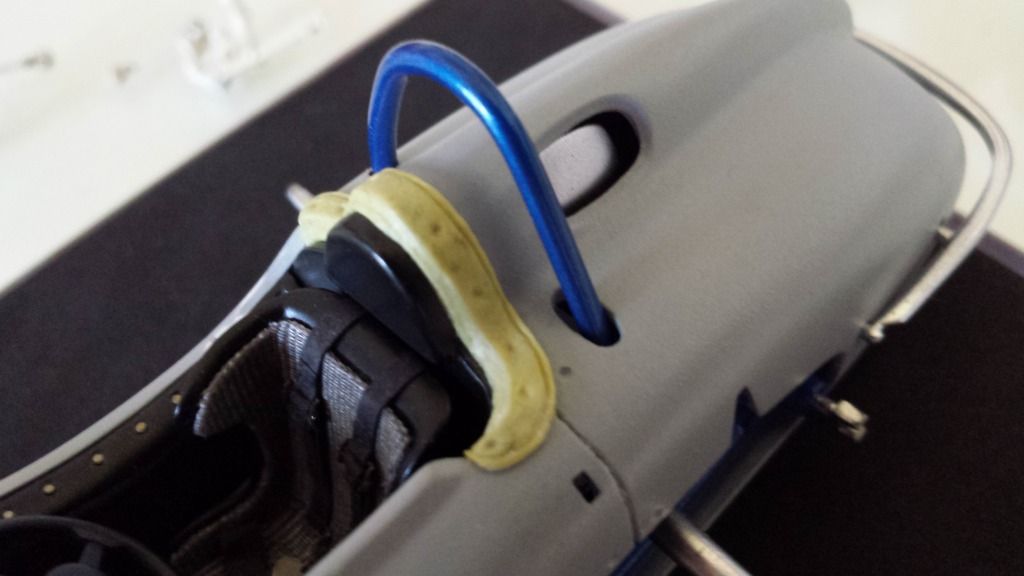 This will be painted semigloss black and indentations are where the photo etched snaps will go once painted. 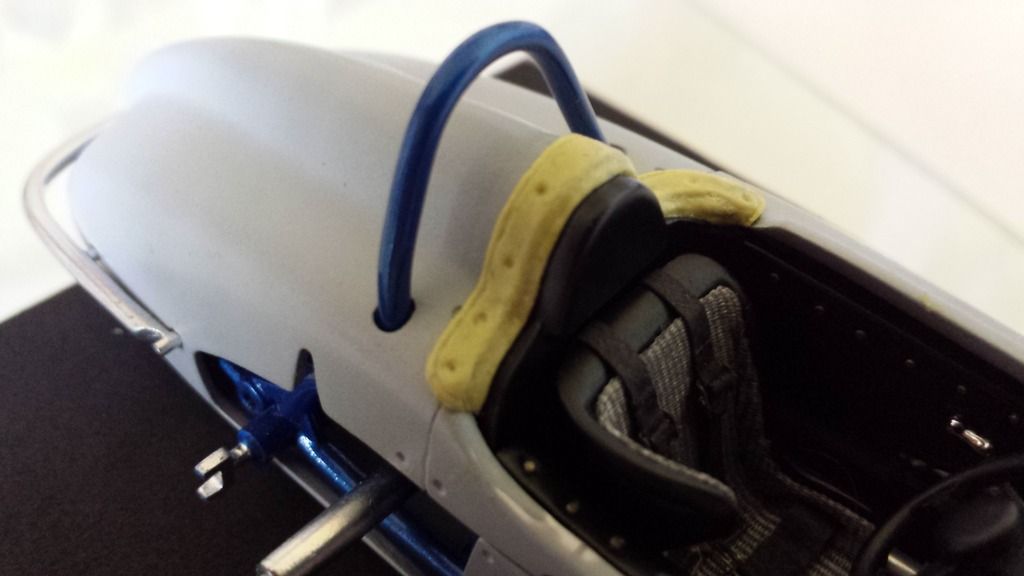 |
|
Deleted
Deleted Member
Posts: 0
|
Post by Deleted on Jul 20, 2016 22:19:18 GMT -5
(UPDATE 7/20/16 : I'm adding a bunch of pictures from the last 3 months as I finished the build this earlier this week!)When last posted I had just started on the rear trim panel.. After sanding down the trim panel I decided to use some .2 mm lead wire to create a border. 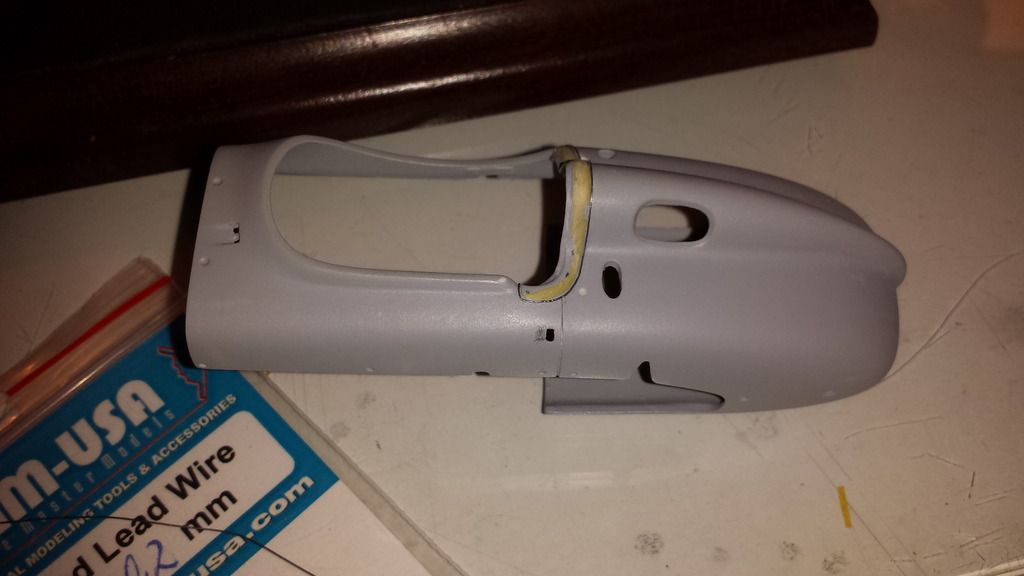 All painted and ready for the indentations for the photoetched snaps. You can see how the lead wire creates a border for the trim panel. 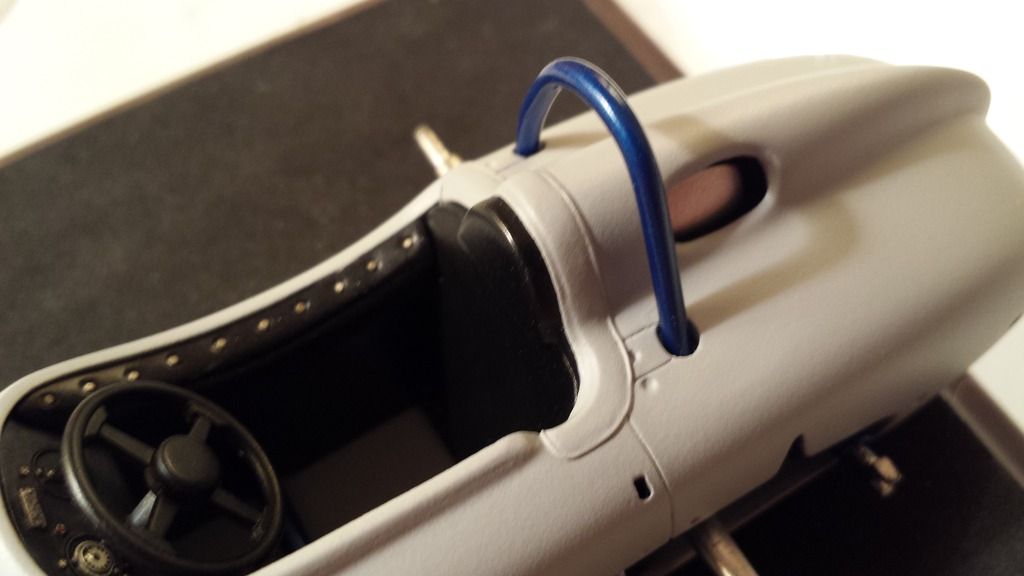 Now onto the resin Tires and Wheels. These tires are from Indycals. They are much more accurate than the original kit tires. But they require some sanding to get rid of the mold lines. I also sanded away the raised lettering cast into the tires so I can l use the supplied Firestone lettering decals. 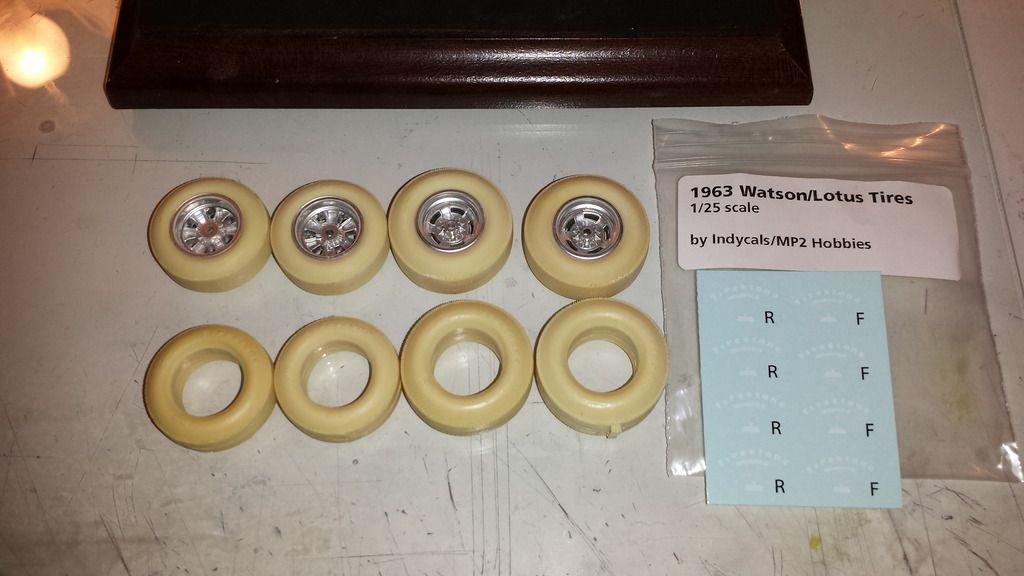 After sanding I painted the tires with a coat of semi gloss black and painted the wheels with custom mix of Alclad Brass and Chrome. 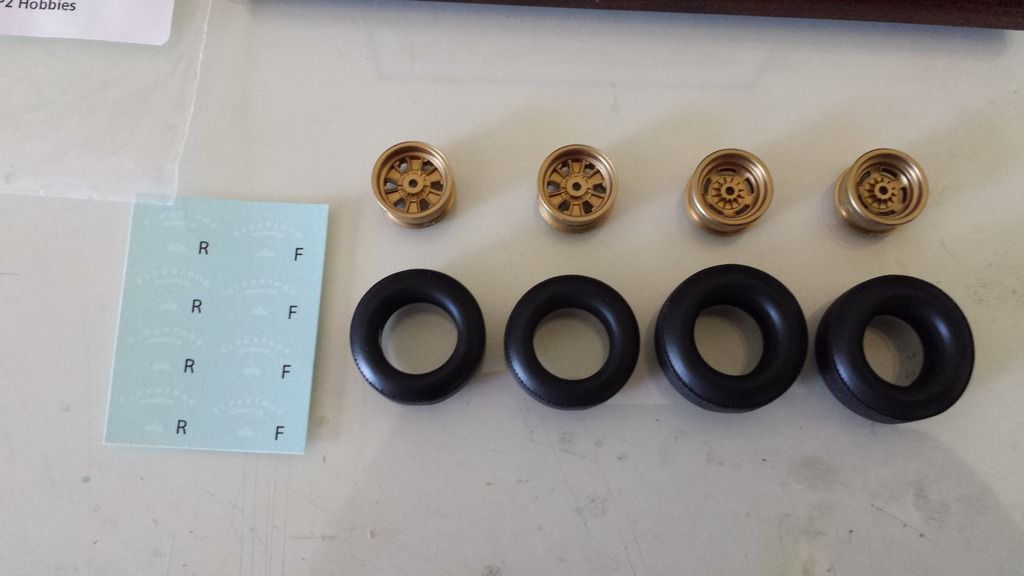 I then coated the resin tires with a coat of clear future so that the lettering decals would not " "silver" and blend into the sidewall of the tires. once the lettering decals were dry, I brushed some dark grey pastels across the lettering with a Q-tip to take away some of the intensity of the white. 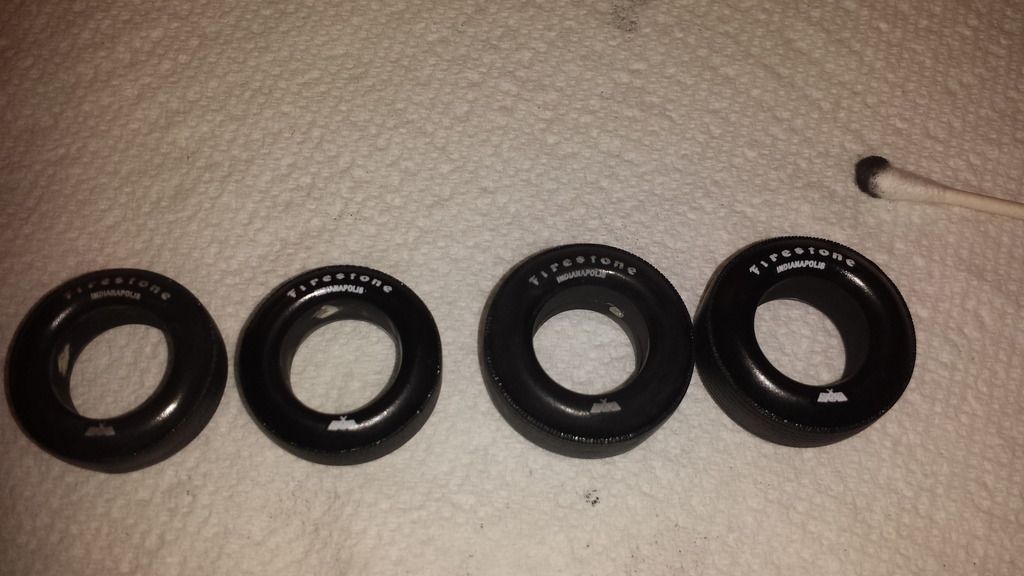
|
|
Deleted
Deleted Member
Posts: 0
|
Post by Deleted on Jul 20, 2016 22:20:03 GMT -5
Tire on the left has had the lettering coated with dark grey pastels . Tire on the right has not. Next step will be to coat the tires with flat clear. 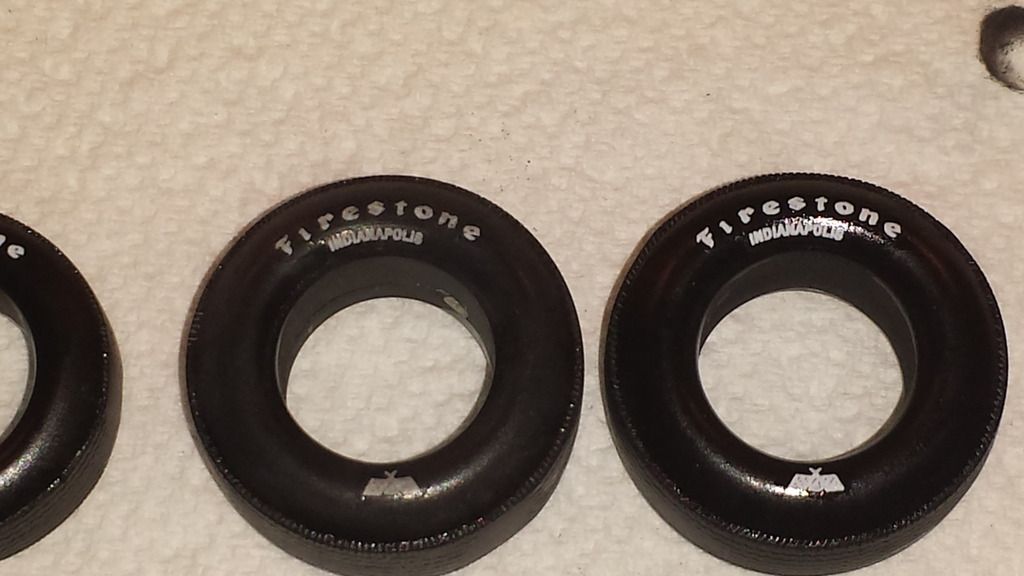 Tires after coating with flat clear 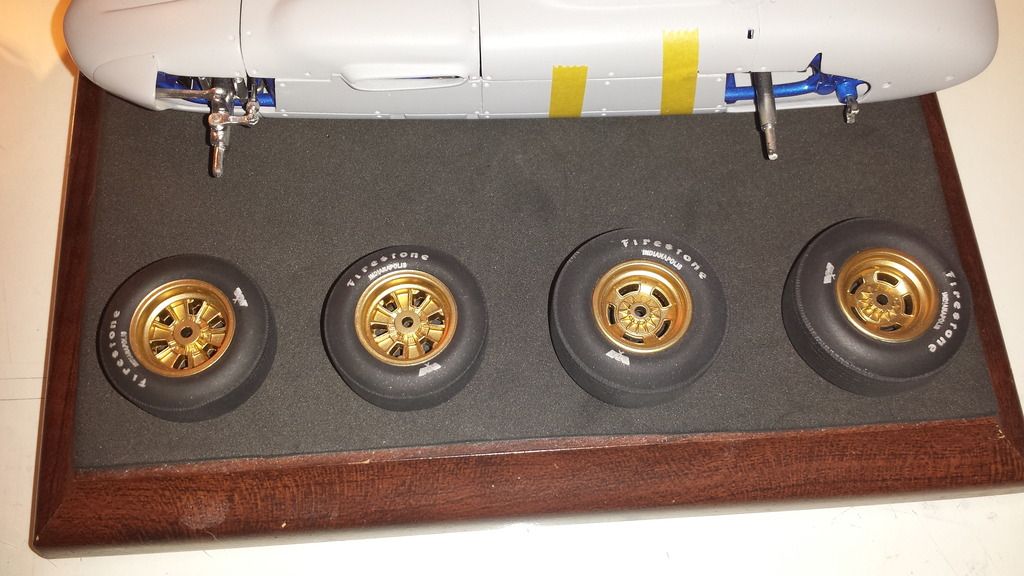 I was not happy with the color of the wheels previously as I felt there was too much of a brass color to replicate the Dow 70 coated Magnesium wheels of the time. So I tried to mute that brass color by spraying a light coat of Alclad Burnt metal over top to the polished brass color. . In this comparison you see straight magnesium colored wheels on the bottom, and the ones I will use on top... 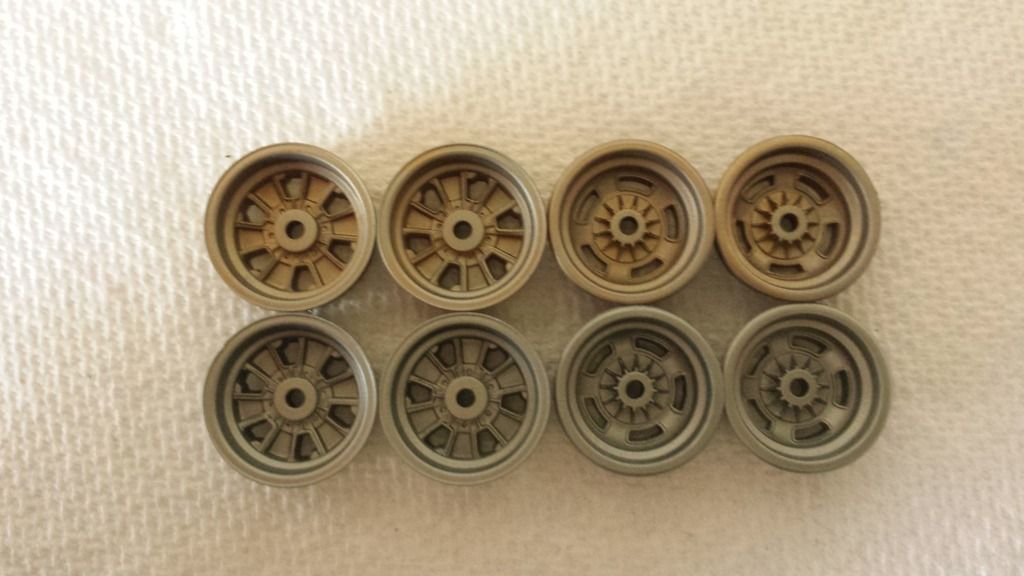 Wheels re-installed on tires ... 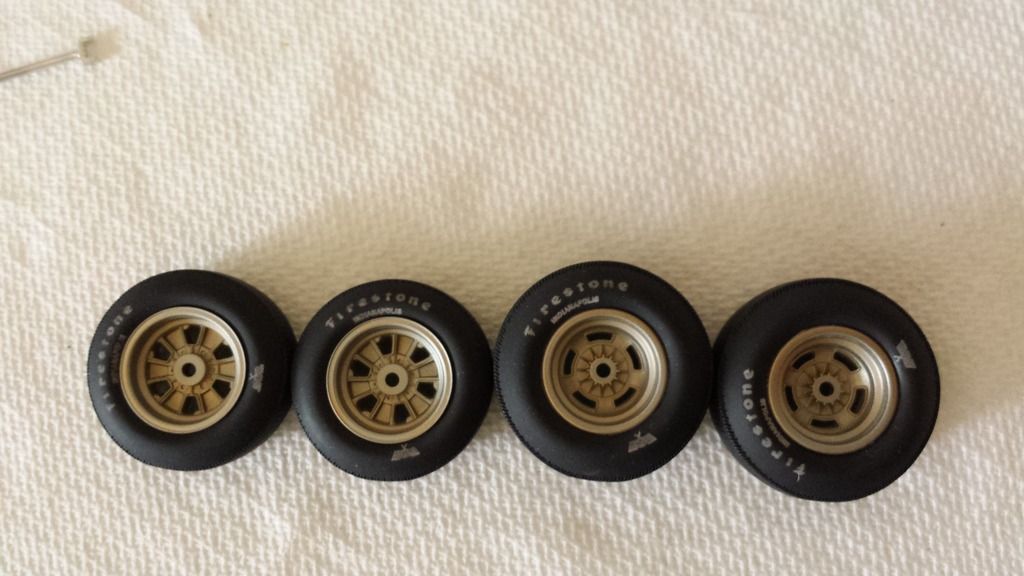 I did not like the look of the kit knock offs (they were too big and the spokes were too thick). So out came the sanding sticks for some surgery.. 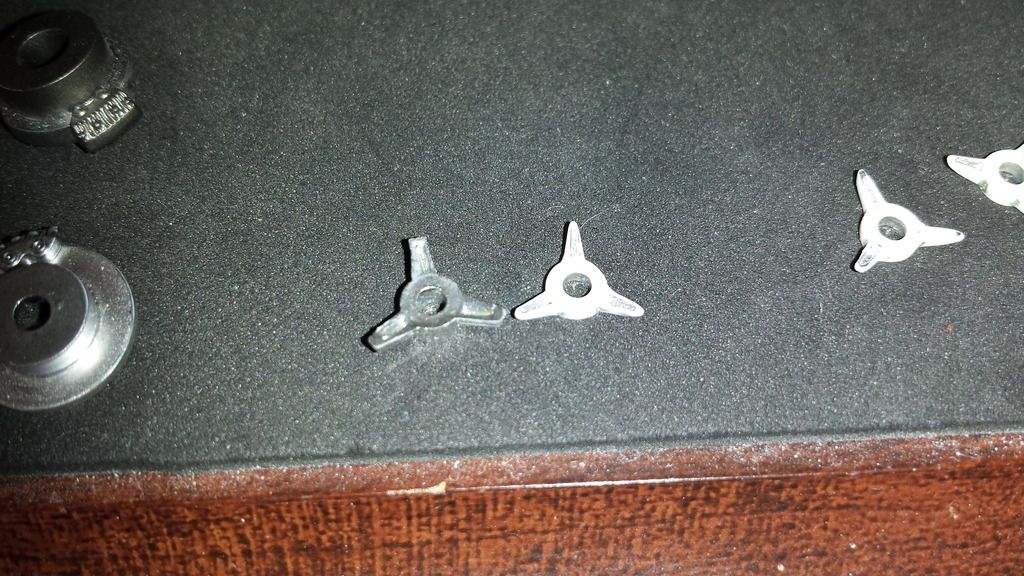 After sanding the knock off were painted black then coated with Alcald chrome. The indentations on the spokes were painted red.. (More on this later) 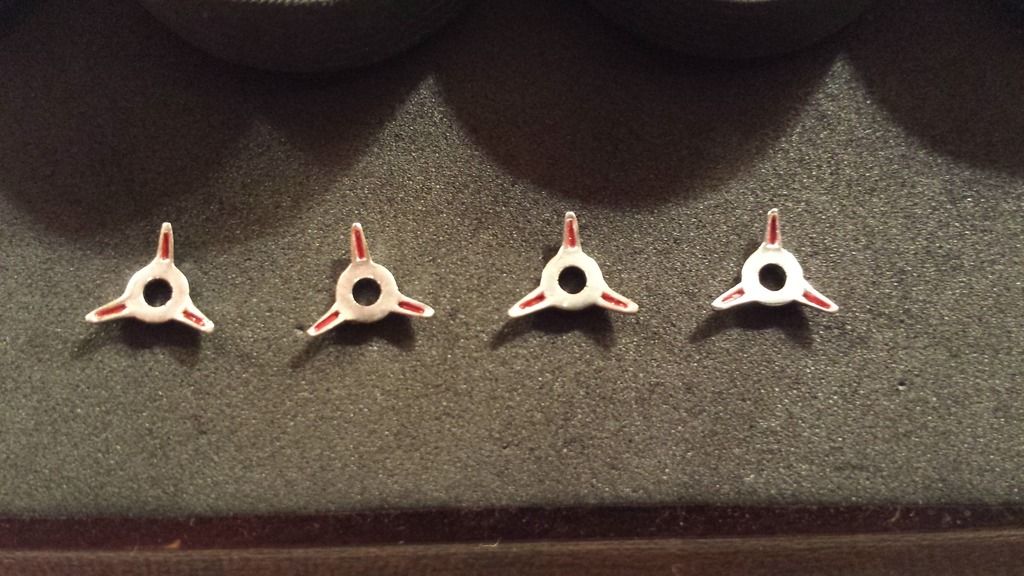 |
|
Deleted
Deleted Member
Posts: 0
|
Post by Deleted on Jul 20, 2016 22:20:56 GMT -5
I decided to tackle on another piece of detailing. I decided to make a front spindle as the kit ones are non existent. Here is a comparison to the real car.. 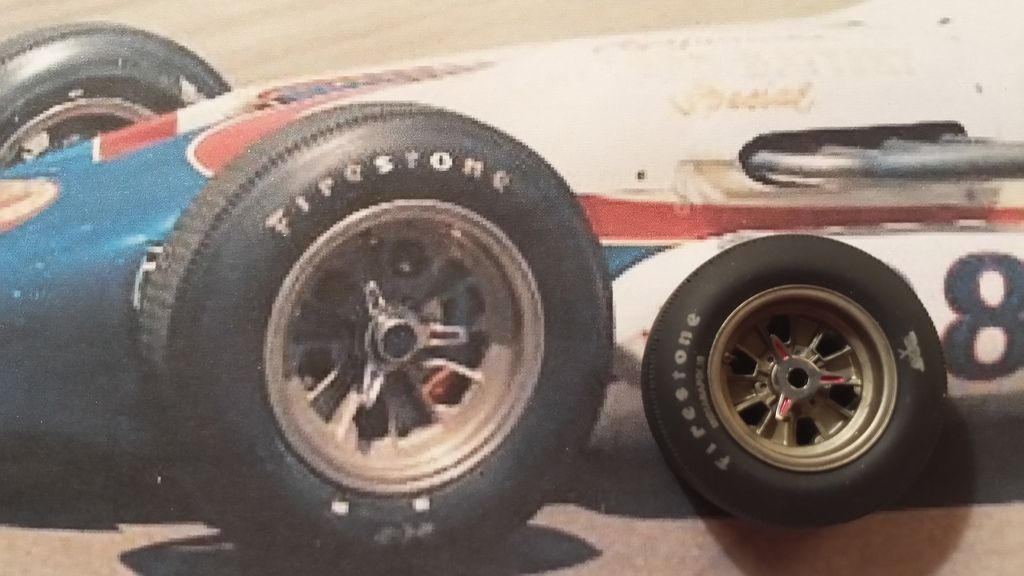 So I hunted down a .070 diameter pop rivet stem, and cut some aluminum tube 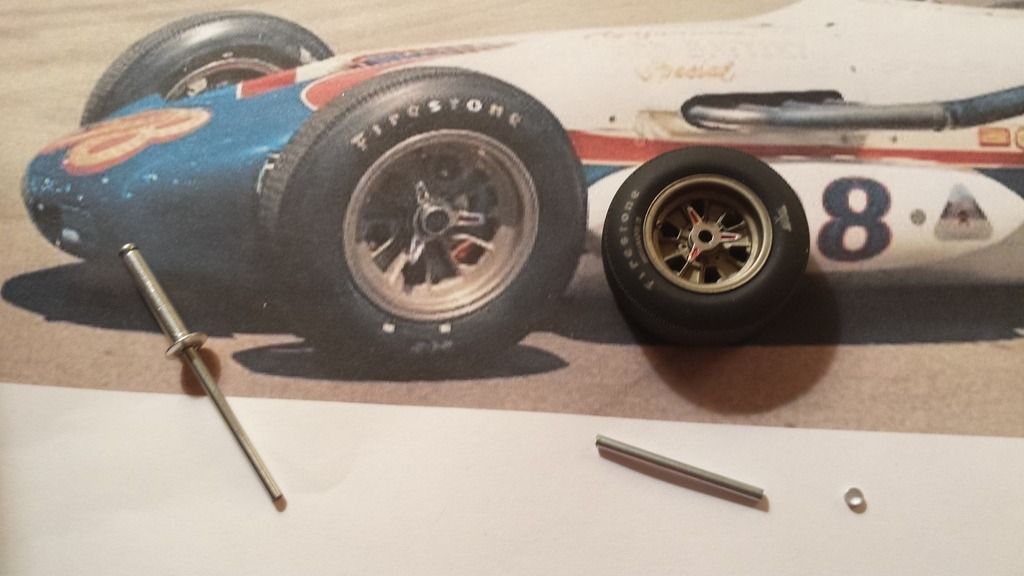 slide the stem with the aluminum tube through the knock off and wheel.. Trimmed the stem and... 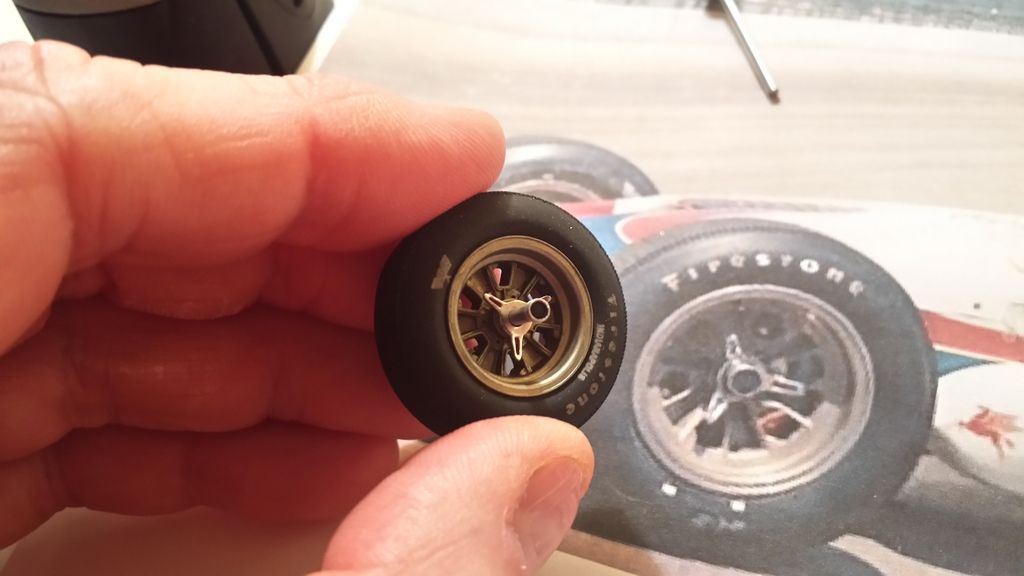 Looks like the spindle in the photo! 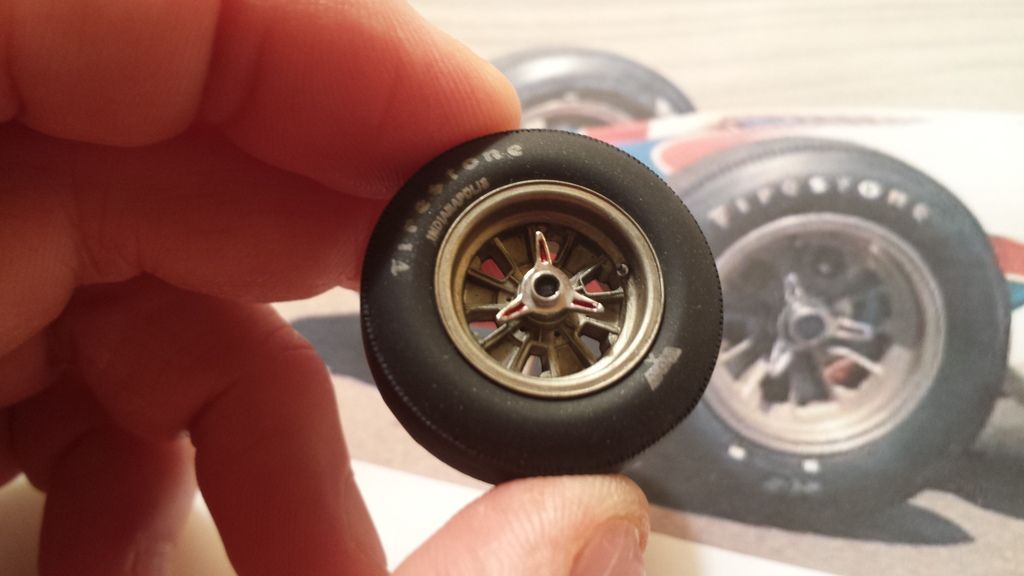 Added some Pro Tech valve stems.. A black wash to the wheels.. Also I decided to paint the indentations on the knock-offs of 2 of the wheels blue as I found out from many people that this was used to distinguish the right and left handed threaded spindles on the right and left sides of the car. Usually the right side/threaded knock offs were indicated with red and the left side/threaded knockoffs with blue. (there are differences here and there but this is what I am going with as it seems the most logical ) 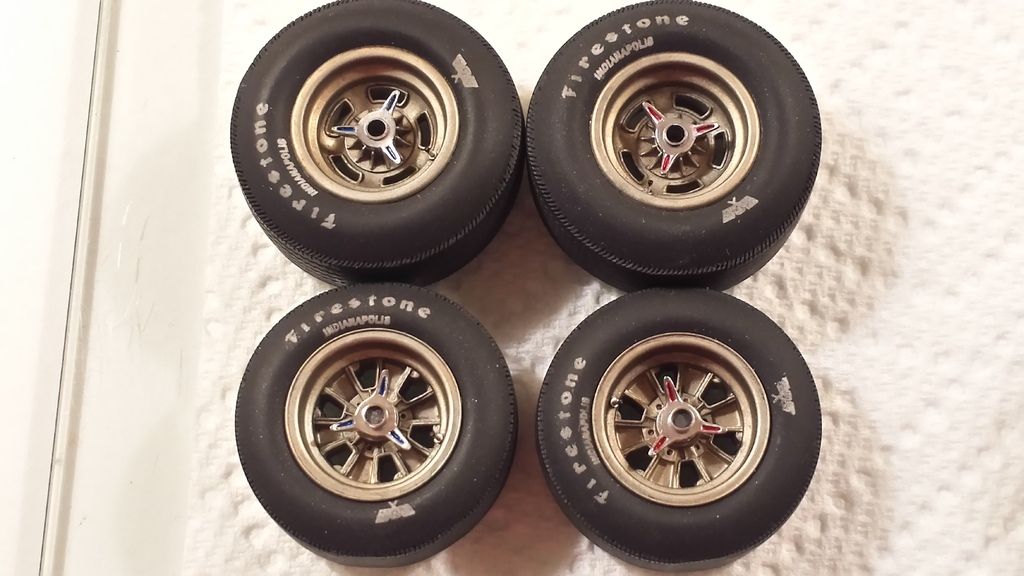 |
|
Deleted
Deleted Member
Posts: 0
|
Post by Deleted on Jul 20, 2016 22:21:34 GMT -5
Next bit of detailing I am tackling is attaching the windshield I vacuformed to the body using .7 mm micro rivets from scale hardware. So very carefully I was able to drill 18 very small holes on the body that the micro rivets fit into. 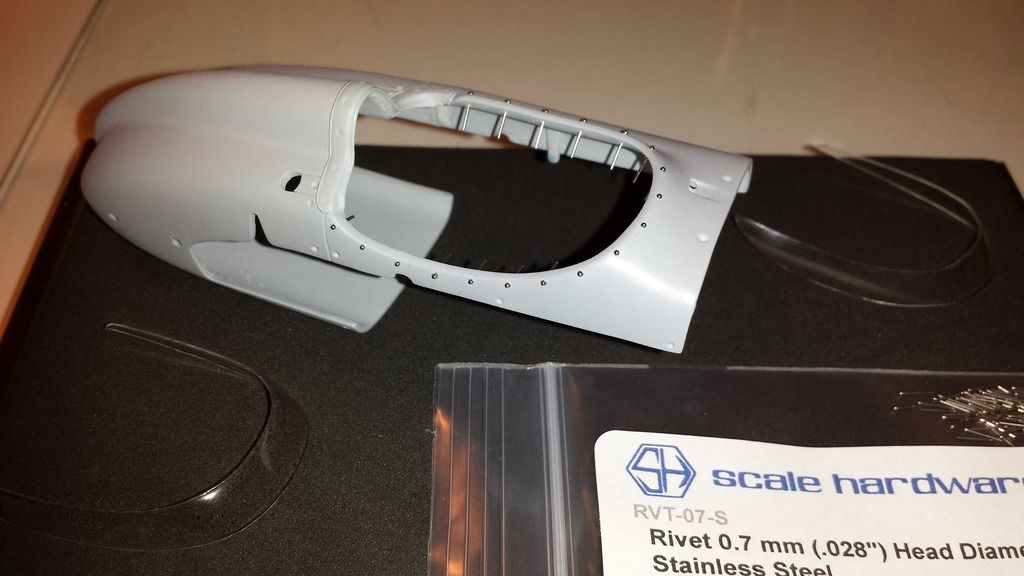 Next all the rivets were removed.. Then I positioned the vacu-formed windshield on the body with some tape..I then very carefully re-drilled the all holes into the windshield. The last step was to re-insert the rivets though the holes in the windshield and the body. 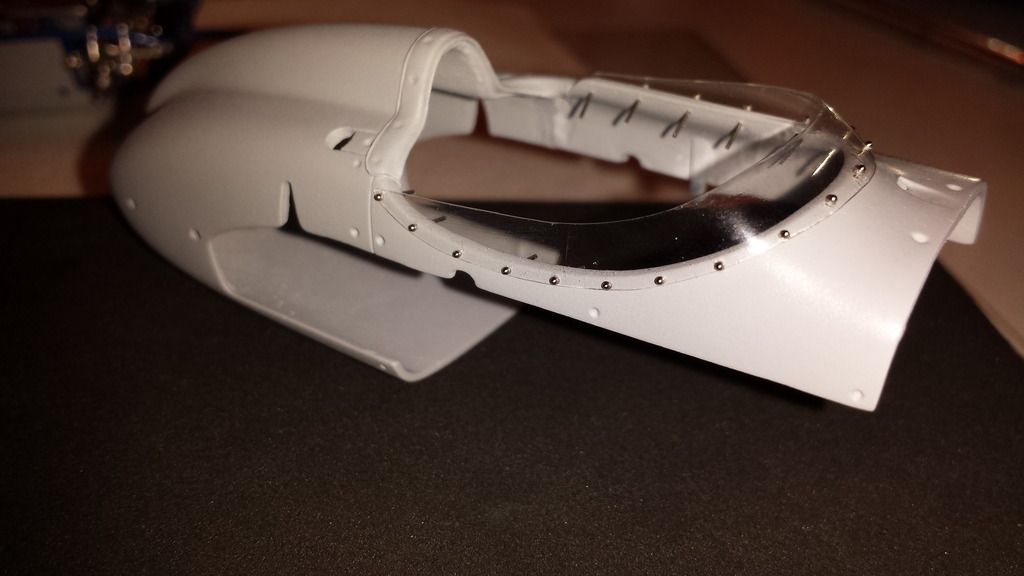 All the windshield rivets are trimmed and the secondary mini windshield is permanently glued in place with clear epoxy. 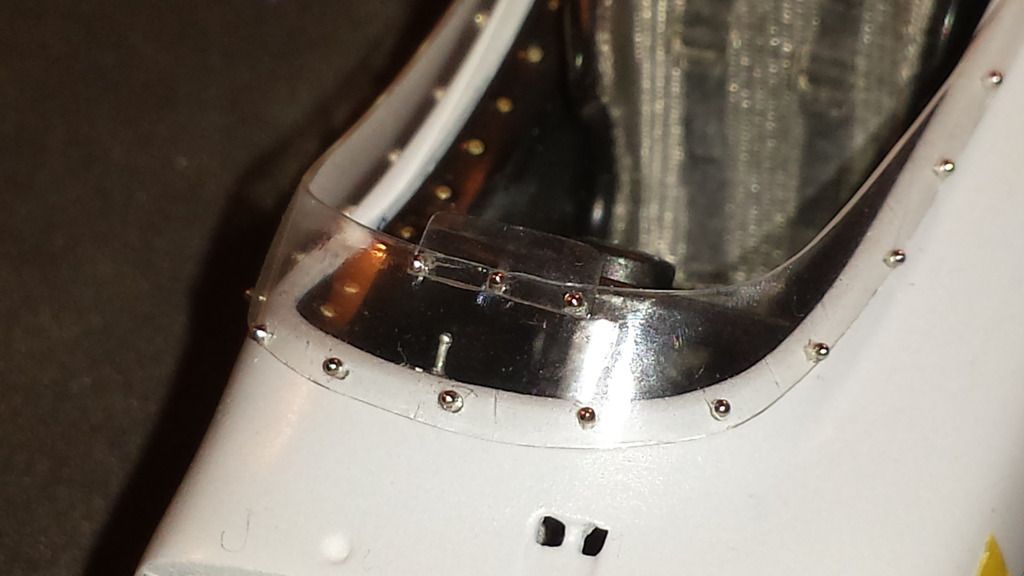 |
|
Deleted
Deleted Member
Posts: 0
|
Post by Deleted on Jul 20, 2016 22:22:22 GMT -5
Now on to the exhaust pipe I replaced the tail pipe with aluminum tube as this looks much more accurate than the plastic pipe and gets rid of the nasty seem that is present on the sides of the kit plastic pipe. 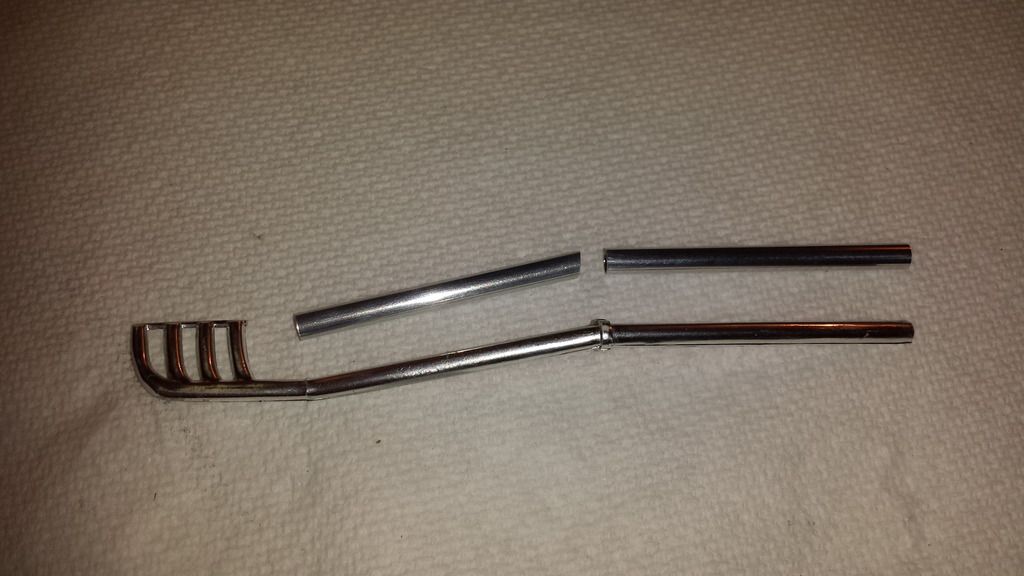 The plastic tail pipe is cut and the Aluminium tube is slid over at the bend.This way I can mimic the original bend of the kit pipe..  The header is sanded to get of the seams and then painted gloss black then with Alclad Chrome. Then the other 2 aluminum tubes slid are on to the exhaust pipe bend and all 3 pieces (header and 2 Aluminum tubes) are glued together.. 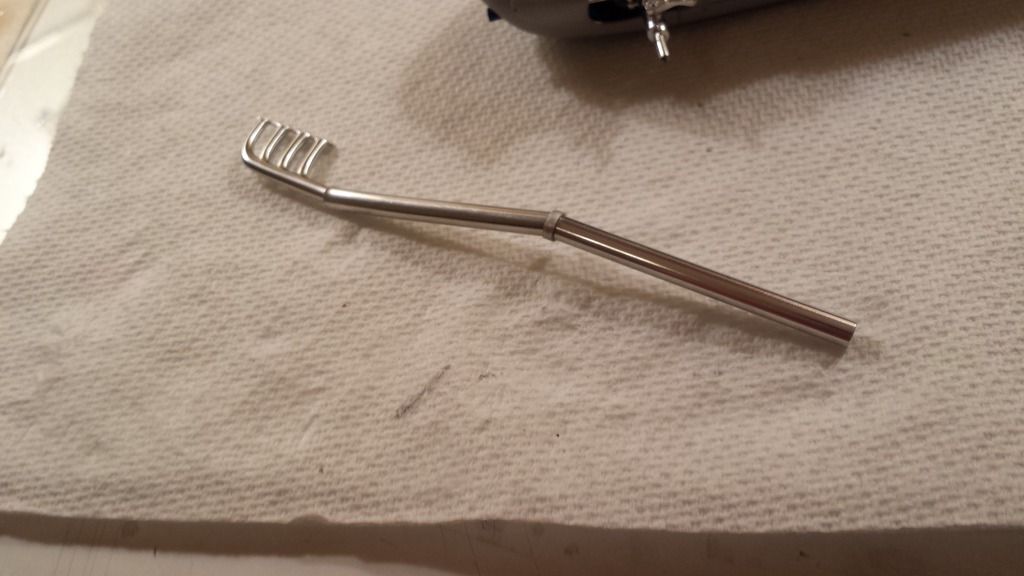 And it fits! Now to heat stain the exhaust with Alclad Hot Metal paints.(Septia, Blue, Purple and Red 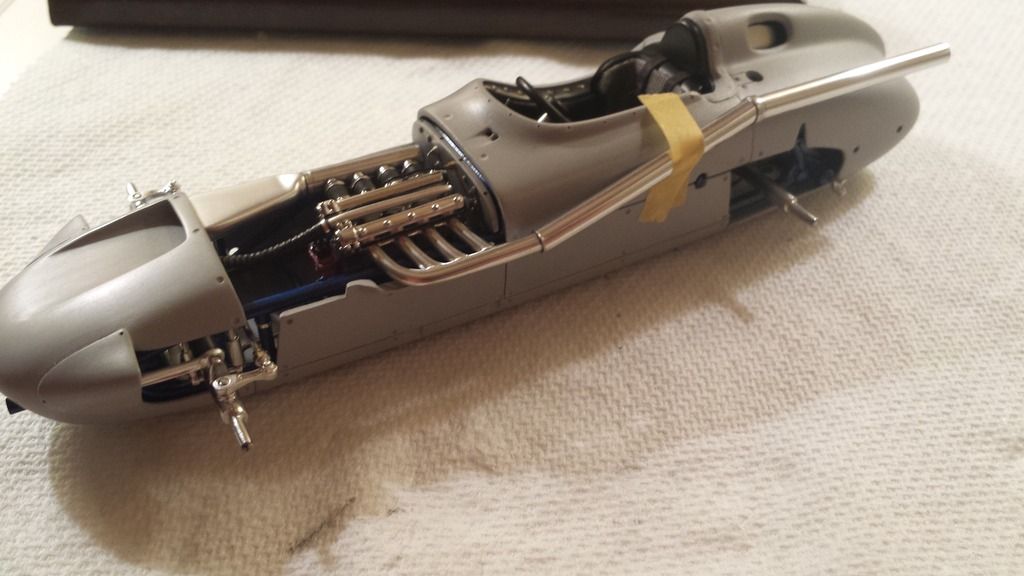 And after a mixture of multiple colors of Alclad Hot Metal paints. It looks like the photo! 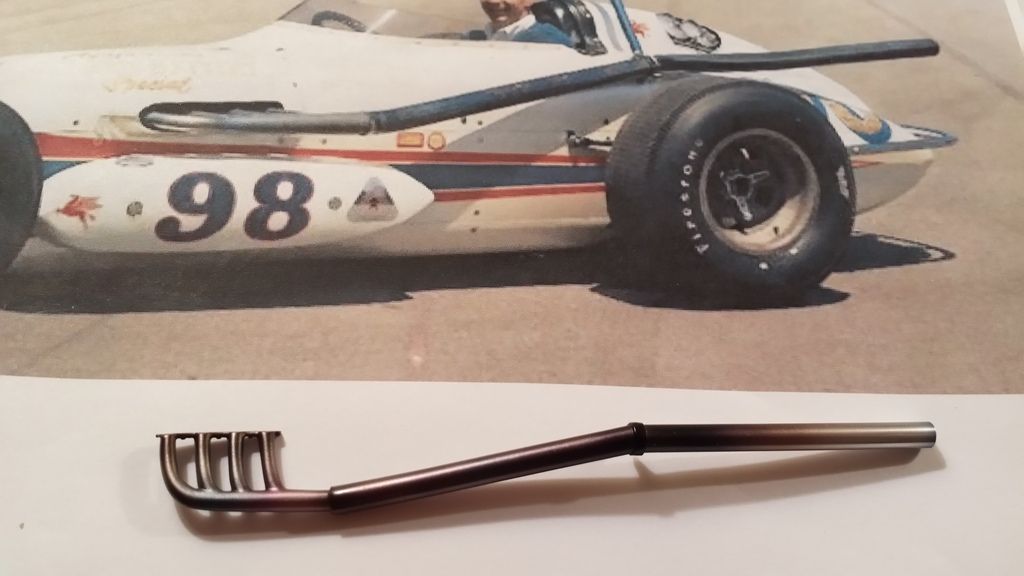 |
|
Deleted
Deleted Member
Posts: 0
|
Post by Deleted on Jul 20, 2016 22:22:48 GMT -5
Added flexible brake lines to calipers and fittings made from some Albion micro tubing and painted Alclad Polished Brass (these are the rear calipers) 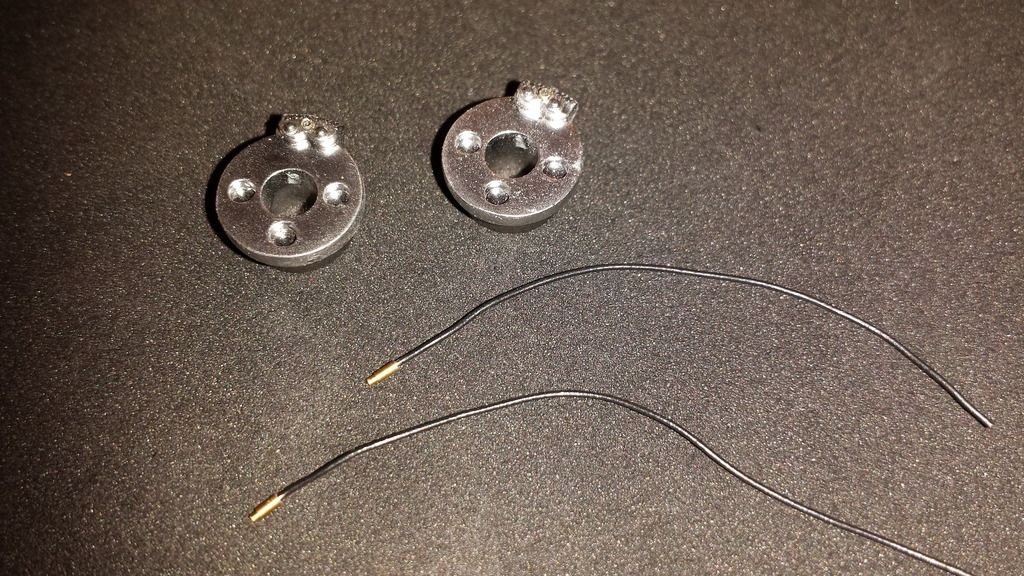 Added hard brake lines in the chassis so that the flexible lines can be attached. Front brakes are glued on and the flexible lines are trimmed and installed on calipers. 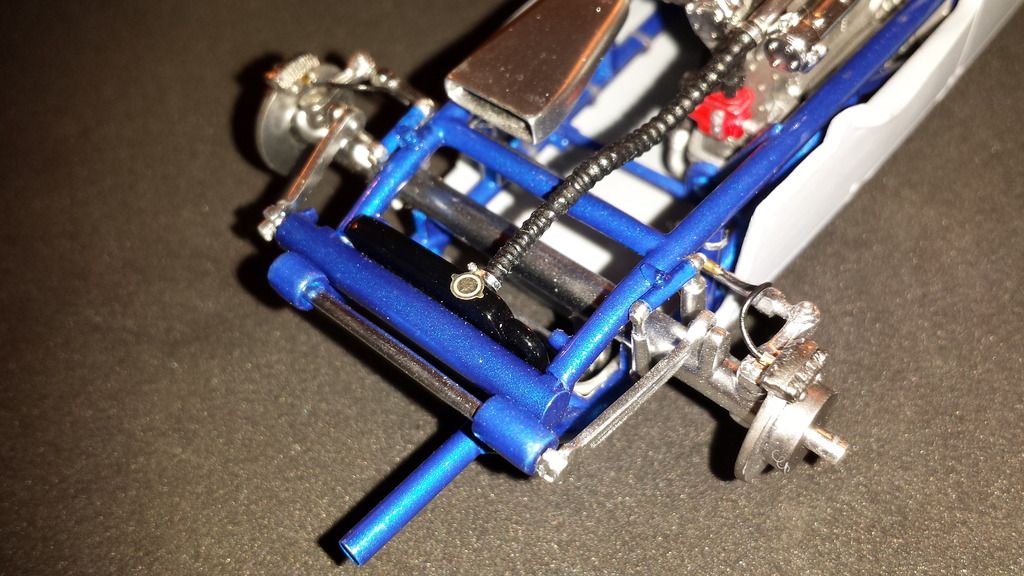 |
|


