|
|
Post by jj66 on Jul 1, 2015 16:33:40 GMT -5
Your accuracy level is fantastic!!
|
|
Deleted
Deleted Member
Posts: 0
|
Post by Deleted on Apr 2, 2016 19:24:46 GMT -5
UPDATE 3/28/16I noticed that the pictures links had been broken in my previous posts so I fixed them.
I started back working on this project earlier this year.. So here are the progress pictures since then..
__________________________________________________________________________________ (Update 1/23/16:)I haven't worked on the Indy Roadster in several months. But in the last couple of weeks I decided to hinge the hood (or bonnet for those in the UK) like the original car. So with a large Model Car Garage photo-etched piano hinge, some cutting and LOTS of sanding here is what I came up with.... Model Car Garage large piano hinge that will be the basis for the hinged hood. 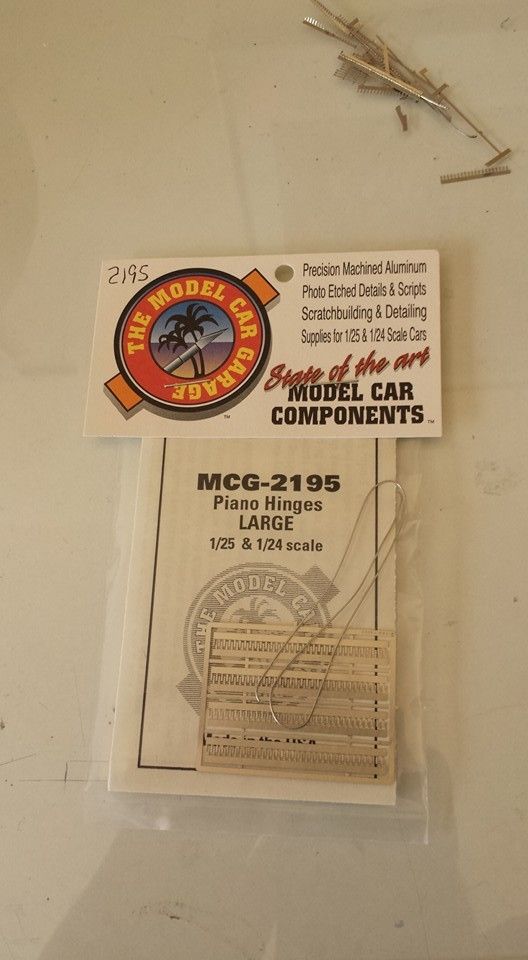 By taking my time and the 2 photoetched hinged parts are wrapped around the included wire 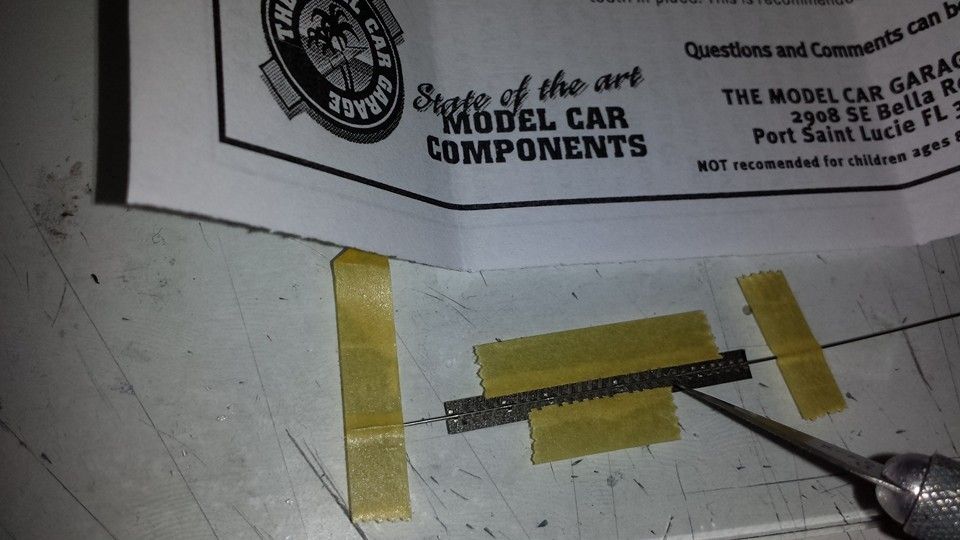 Completed photo-etched hinge is laid on top of the hood. 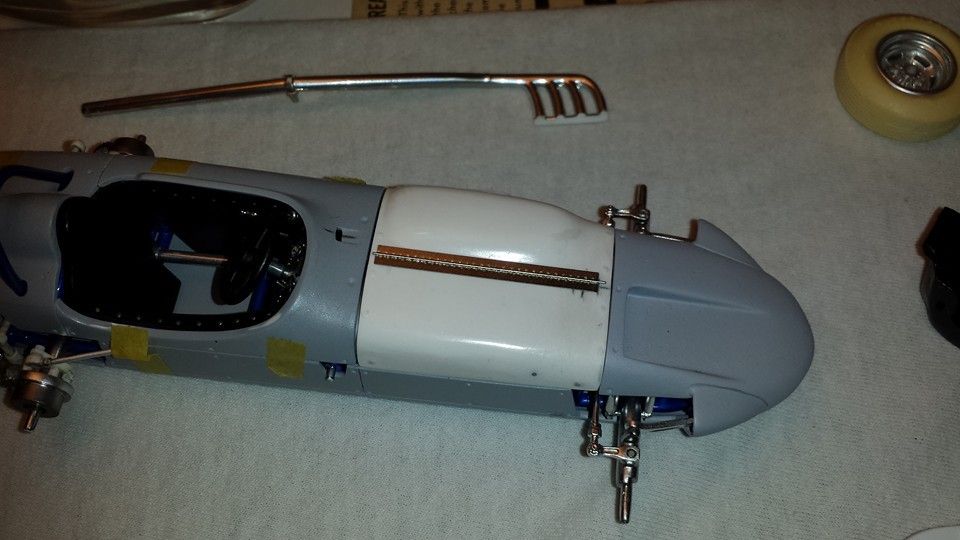
|
|
Deleted
Deleted Member
Posts: 0
|
Post by Deleted on Apr 2, 2016 19:25:40 GMT -5
I had measured several times to find the center line of the hood. This where I will cut the hood in half using a razor blade. Once cut in half the hinge will be fitted to the hood pieces from the underside. 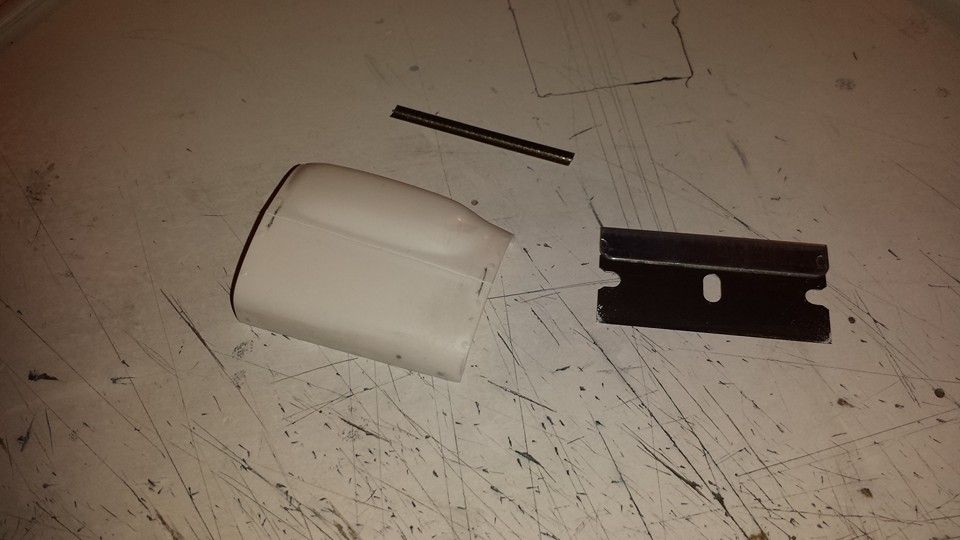 Hood is cut on half and one side is sanded from the underside and taped in place. This looks like it will work! 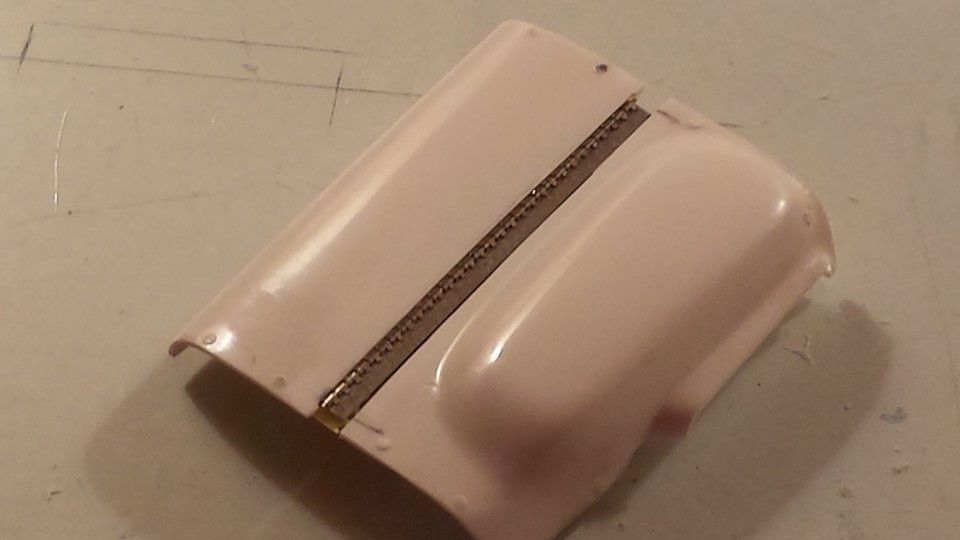 After a day of sanding, fitting and drilling indentations where the dzus fasteners will god the hood half ' s are ready to be attached to the photo-etched hinge. 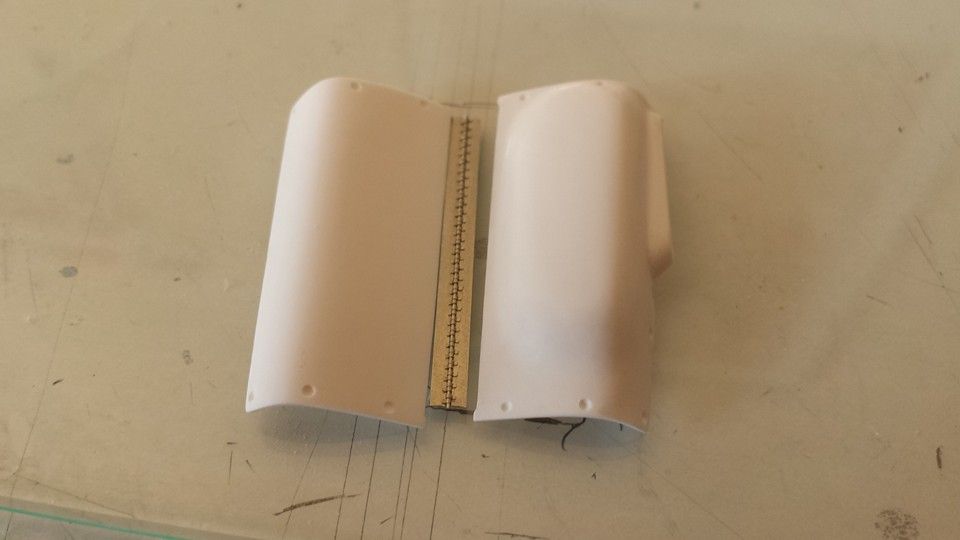 |
|
Deleted
Deleted Member
Posts: 0
|
Post by Deleted on Apr 2, 2016 19:26:53 GMT -5
Hinge is attached very carefully to the underside of the hood using slow curing CA glue. 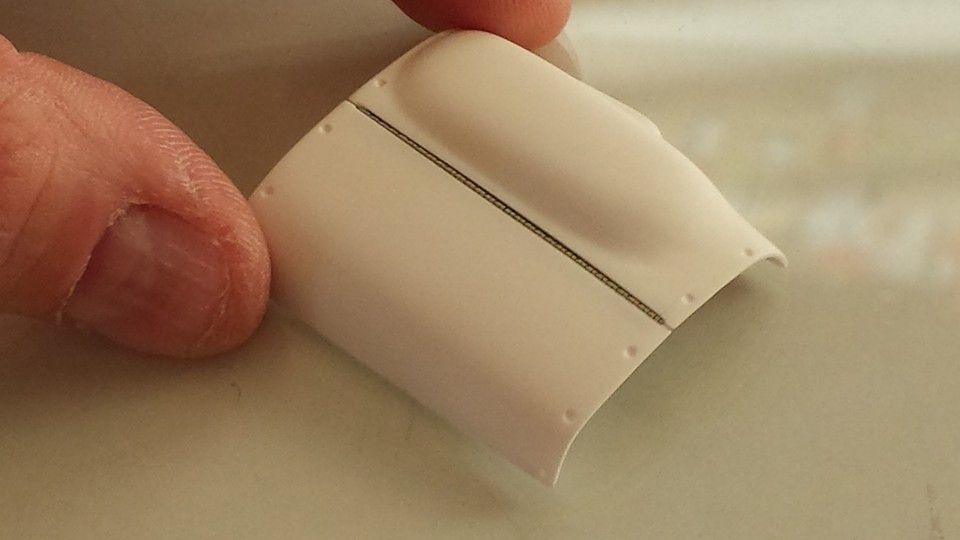 I did a bunch of sanding to the underside of the the hood as well. Looks clean with the hinge attached. 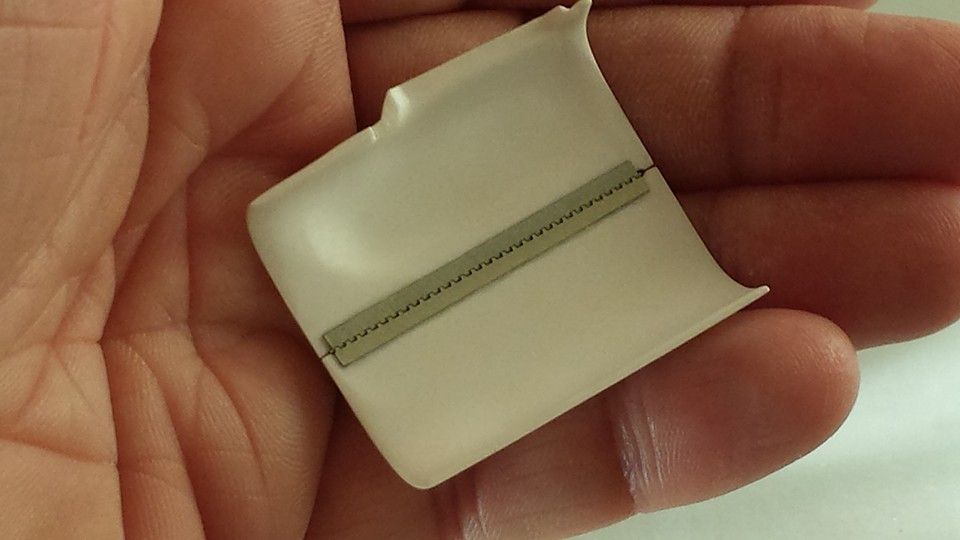 It fits!!! 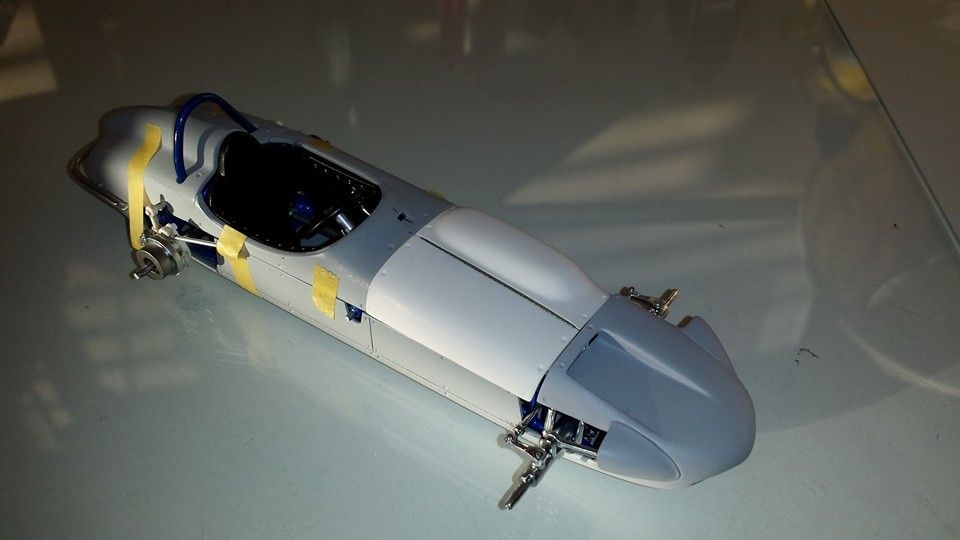 |
|
Deleted
Deleted Member
Posts: 0
|
Post by Deleted on Apr 2, 2016 19:27:08 GMT -5
Better yet... It works!!! 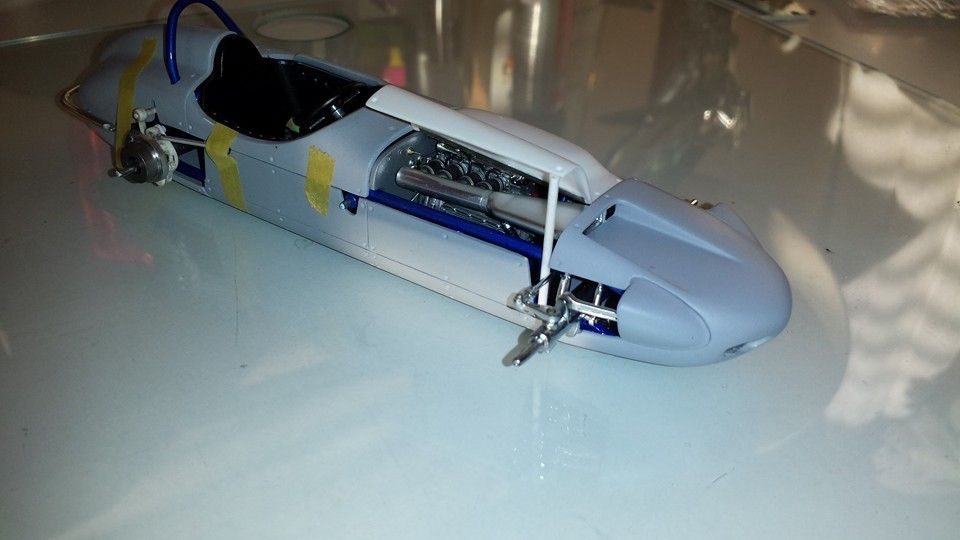 Another view! 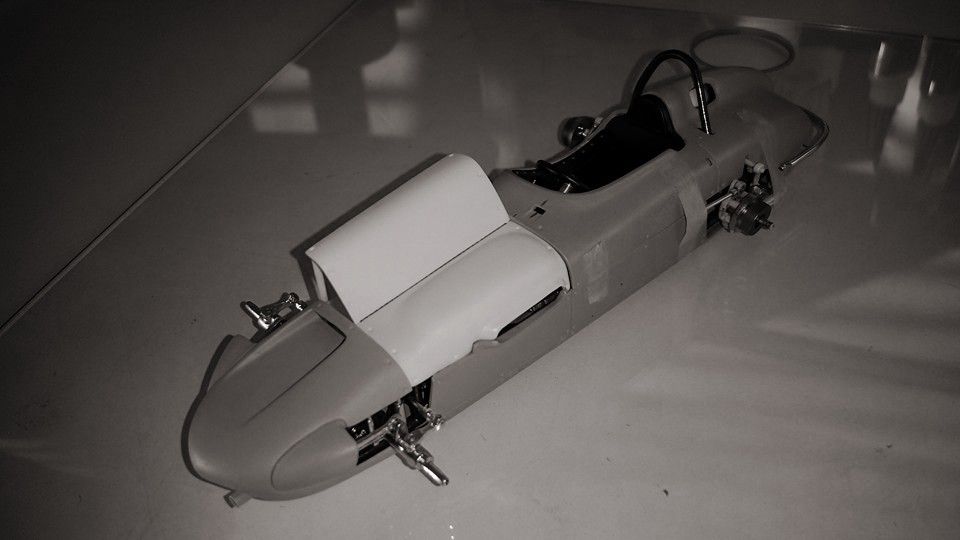 From the front opening on the left side. 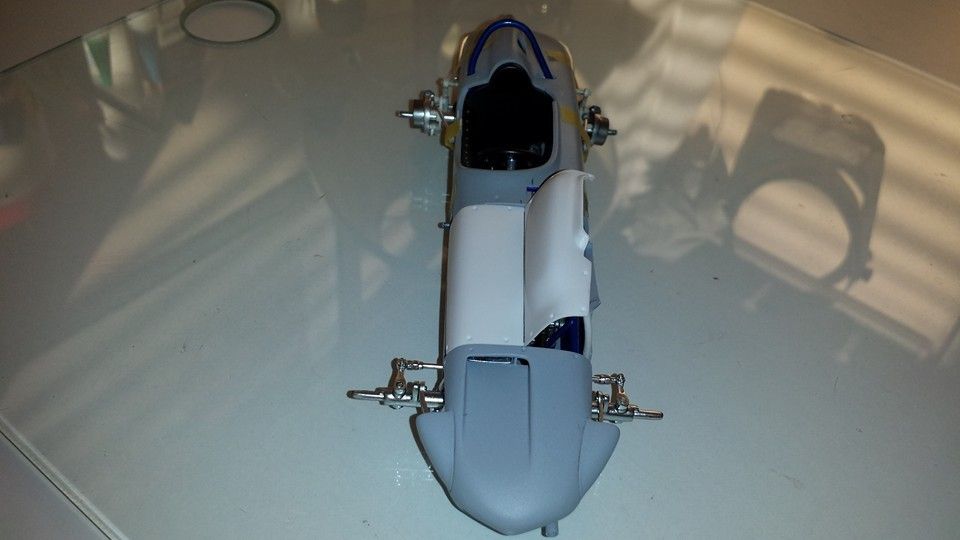 Works great! 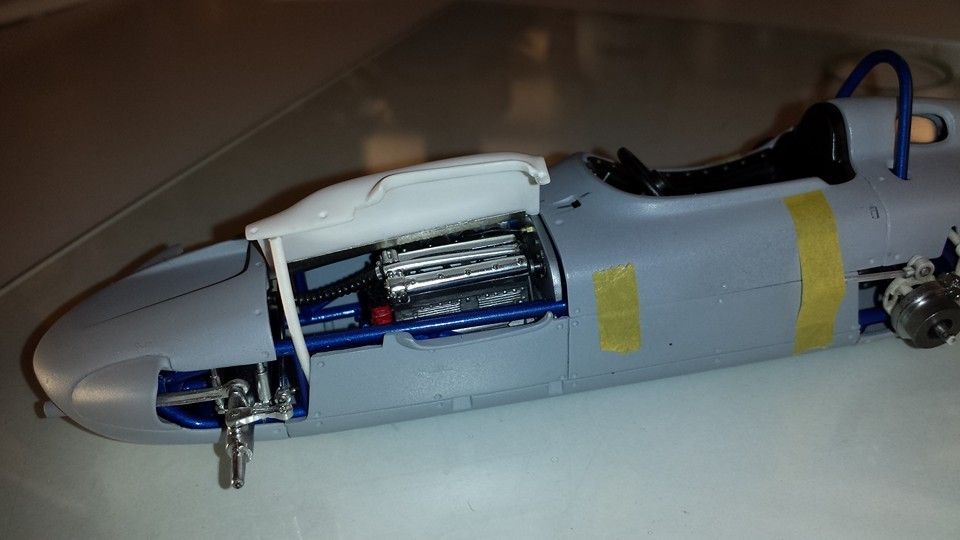 |
|
Deleted
Deleted Member
Posts: 0
|
Post by Deleted on Apr 2, 2016 19:28:15 GMT -5
(Update 2/15/2016) Did some more work over the weekend.. Made it so the nose cone will be removable with the aid in some small magnets.Plus I did some additional detail work around the nose cone. It was slow going but I am satisfied with how it's turned out. I found the nose cone needed a recessed lip so that the hood will lay on it flush.. So I got out some lead sheet and made a recess. The holes are indications of where Dzus fasteners would be.. 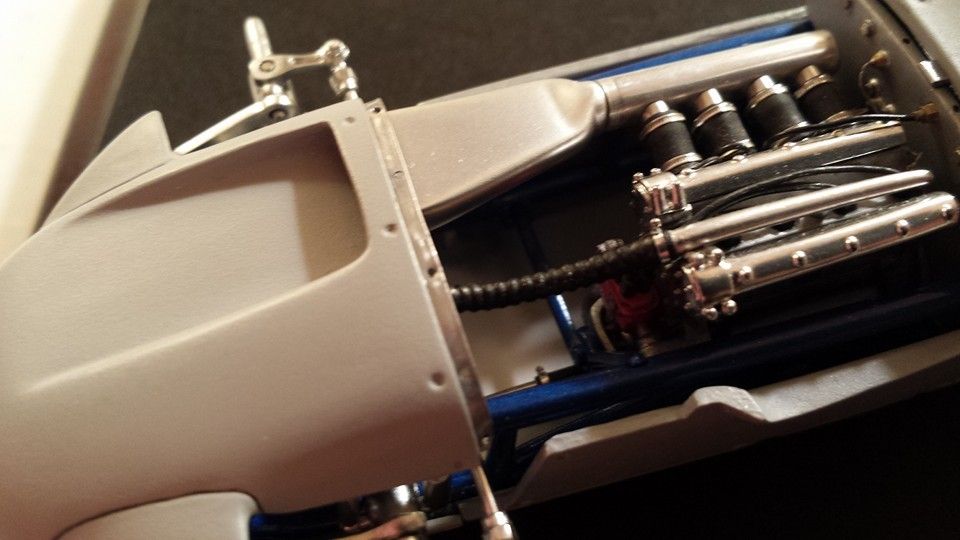 I also epoxied on the the ram air scoop to the intake and fitted the nose cone on to make sure the scoop fits in the opening correctly while the epoxy dried. 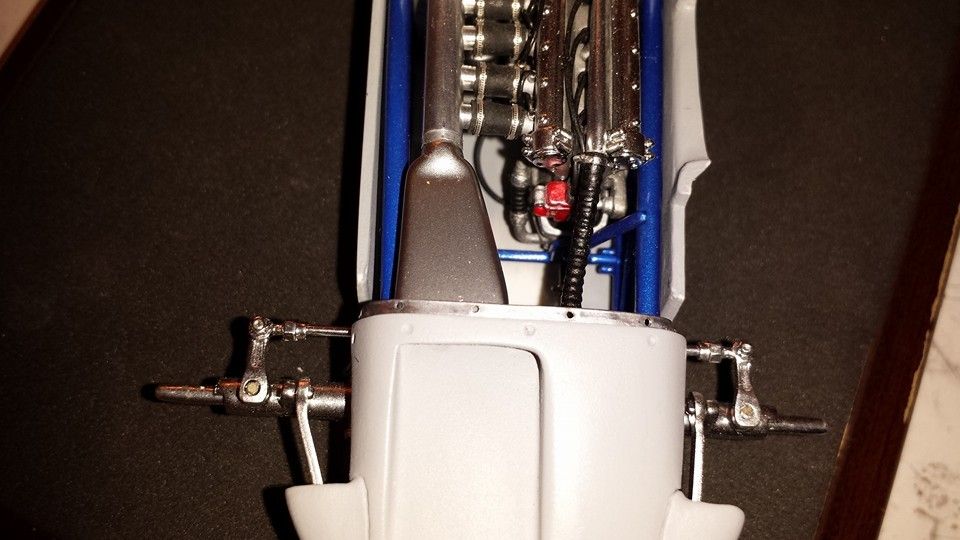 The scoop fits in the opening perfectly! 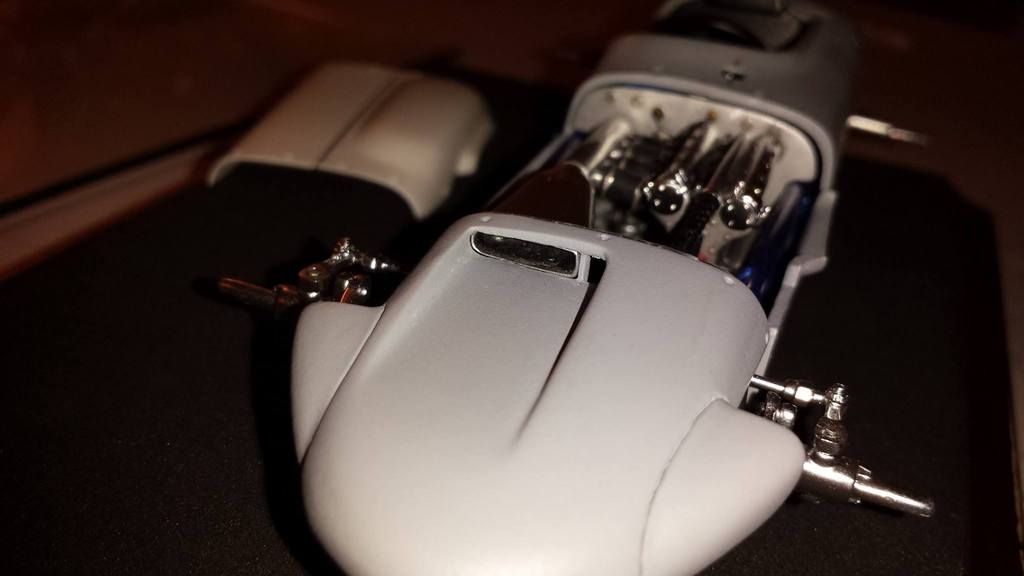
|
|
Deleted
Deleted Member
Posts: 0
|
Post by Deleted on Apr 2, 2016 19:29:51 GMT -5
One problem with this kit that has been bugging me ever since I started on it is the fact when the nose cone is glued on it covers up all the work I did on the front part of the chassis. I want the nose cone to be removable which wasn't a consideration when this kit was made 50 years ago. Previously, I had been mocking up the nose cone with tape but I had heard some modelers had been using micro magnets to close up opening panels. Well I had some pieces of small magnets and a Dremel tool... So... I drilled out the attachment point for the nose cone on the lower body to fit in the magnets.. Then I glued the magnets into the holes... 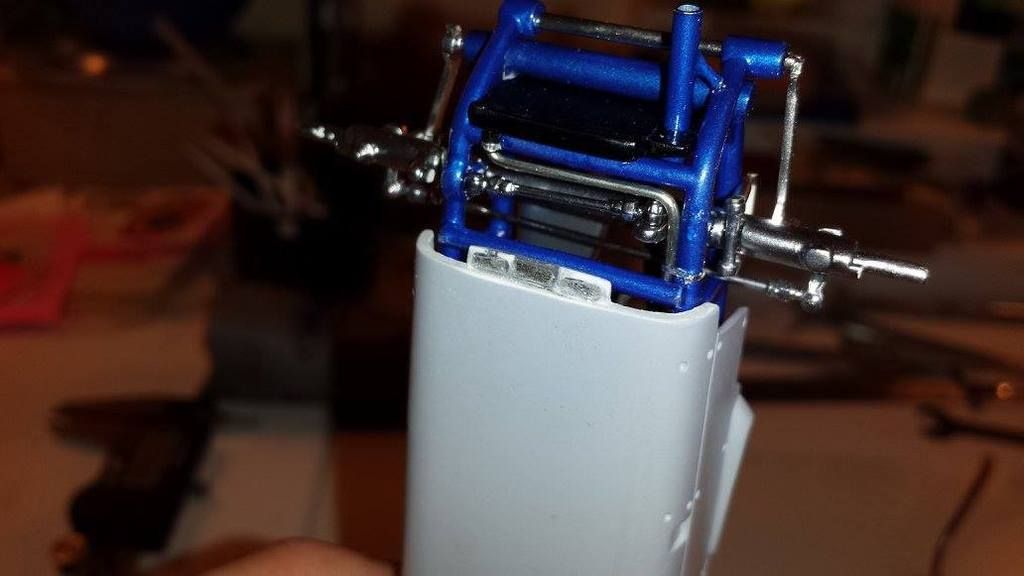 Likewise on the attachment point of the nose cone I drilled out a small opening in the recess and glued in a couple of strips of steel wire so the magnets have something to attach to. 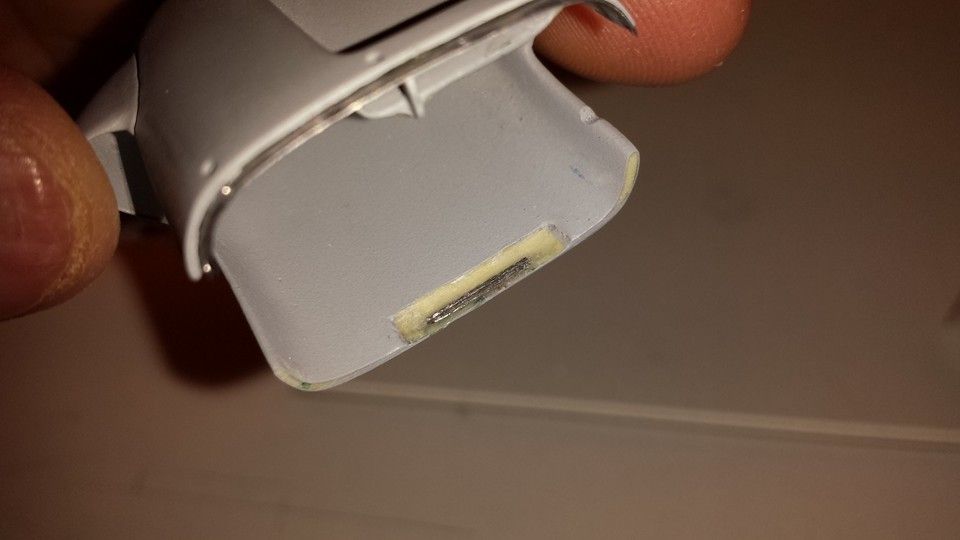 |
|
Deleted
Deleted Member
Posts: 0
|
Post by Deleted on Apr 2, 2016 19:30:44 GMT -5
The nose cone now attaches to the body magnetically. With the hood in place the fit is nice and flush.  And with the nose cone attached to the body, you can see how the nose cone recess gives a place where the hood can open. 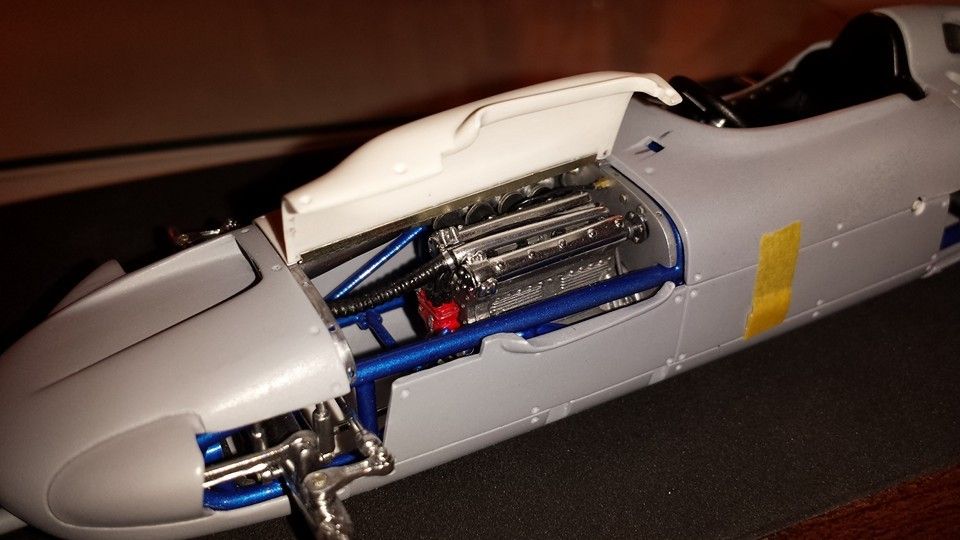 Now the nose cone can be removed to expose the front part of the chassis/engine and can easily be put back on! 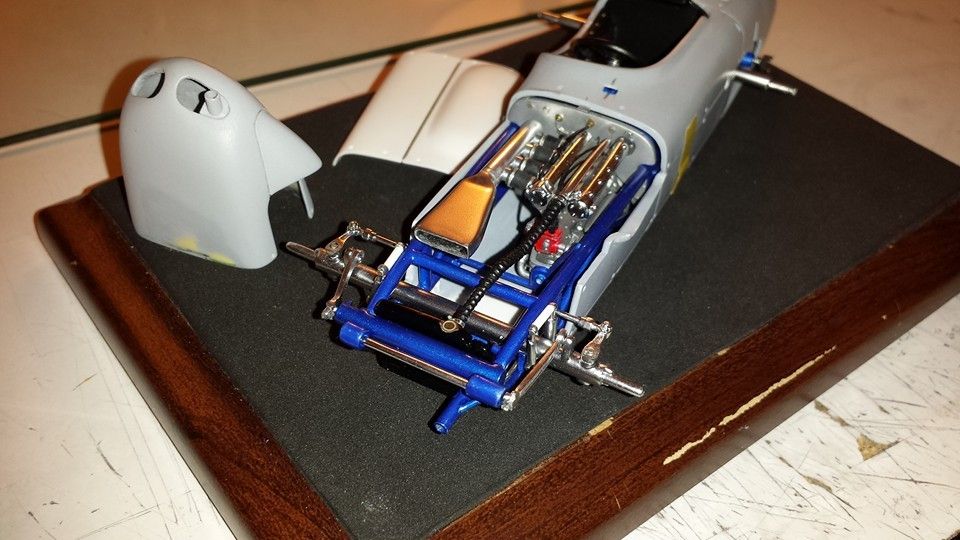 |
|
Deleted
Deleted Member
Posts: 0
|
Post by Deleted on Apr 2, 2016 19:32:14 GMT -5
(Update: 2/28/16)Progress pictures of work I did this weekend on the roadster.. The pictures I added are of the modifications to starter tube to work with the removable front end. The upholstering of the driver seat and the adding seat belts. After I made the front end removable... I ran into another problem... The problem stems from the starting tube that was on the front of the chassis was too short and did not protrude though the opening on the nose cone (I had simulated it prior to making the front end removable). So I took off the starting tube that was on the chassis and ended up creating a longer one. 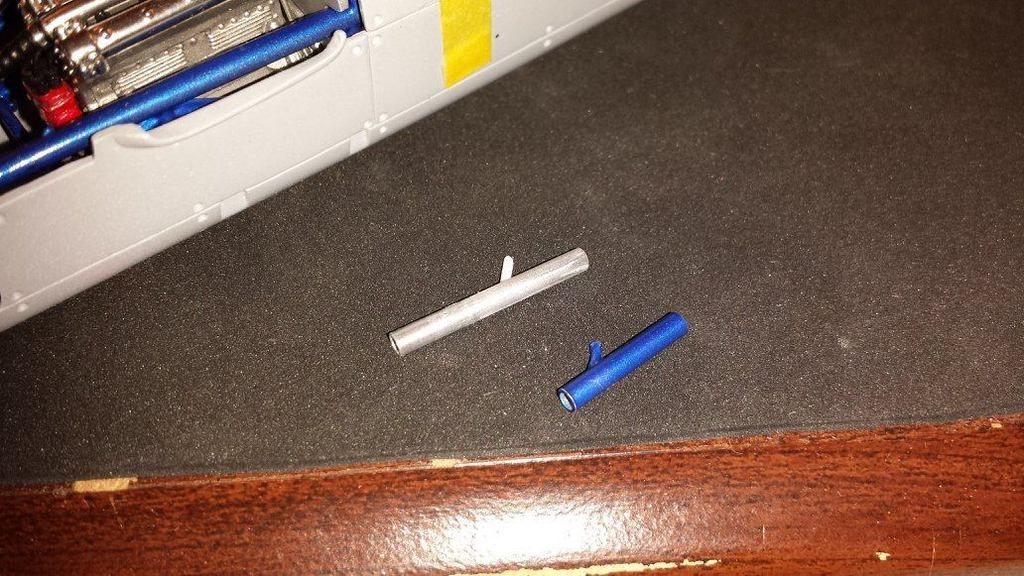 Longer starting tube mocked on chassis. 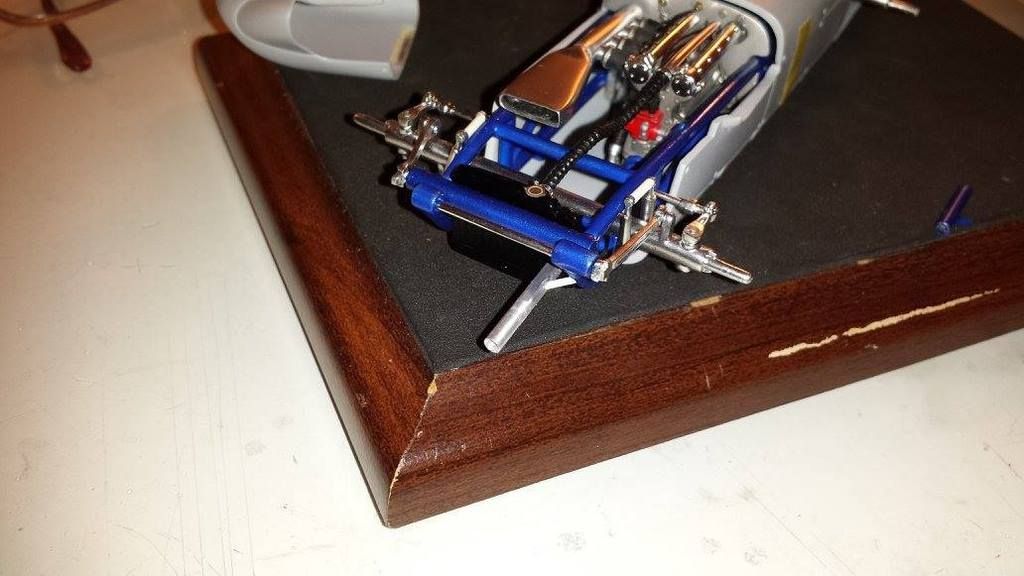
|
|
Deleted
Deleted Member
Posts: 0
|
Post by Deleted on Apr 2, 2016 19:32:51 GMT -5
Starting tube painted and reinstalled on chassis. 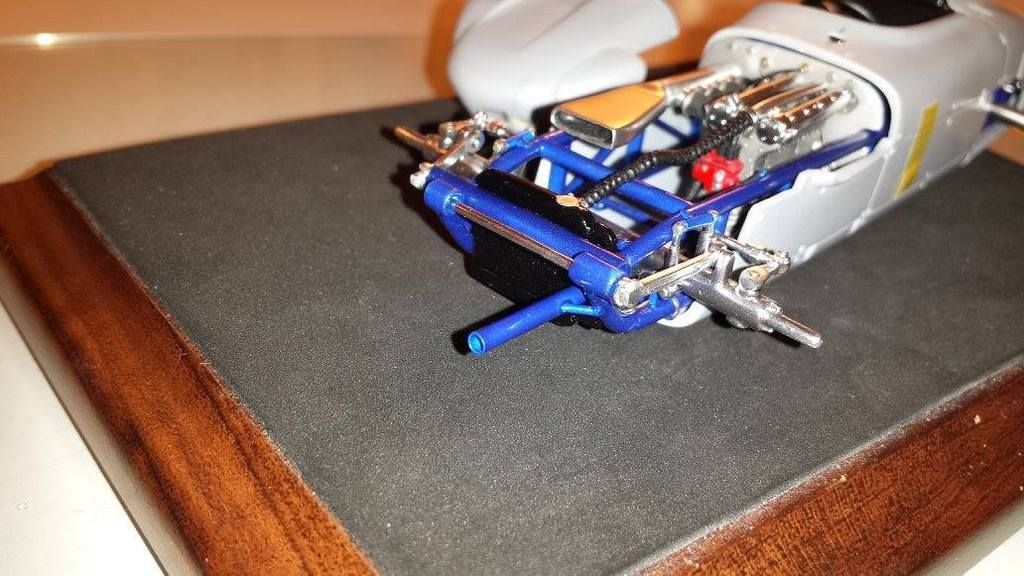 Removed the simulated tube I had on the nose cone originally and drilled out the hole. Now the longer starting tube protrudes through the opening like it should. 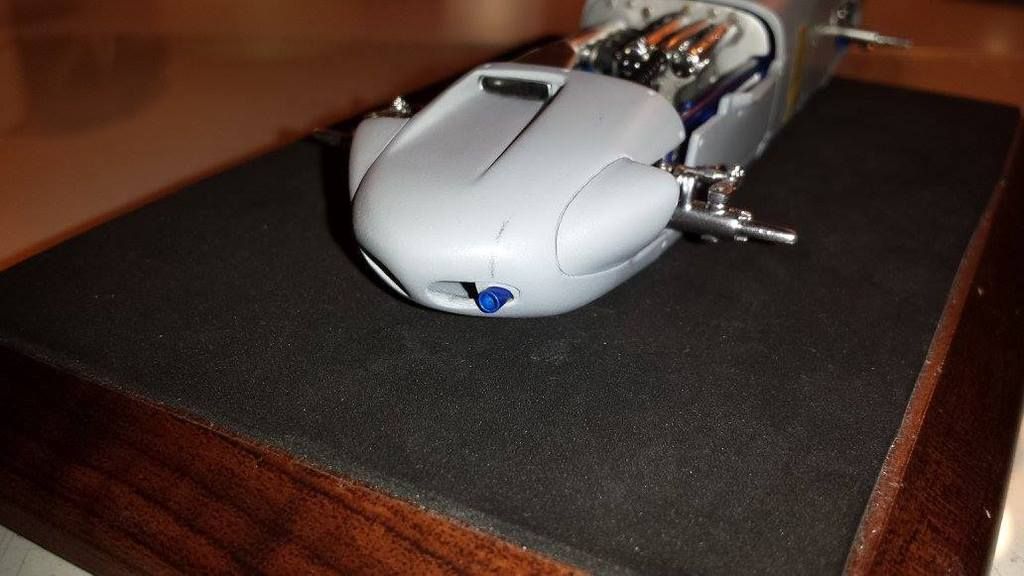 I also repainted the upper front shock mounts to the same color of the chassis and made some small mounts to mount the shock tubes on chassis. 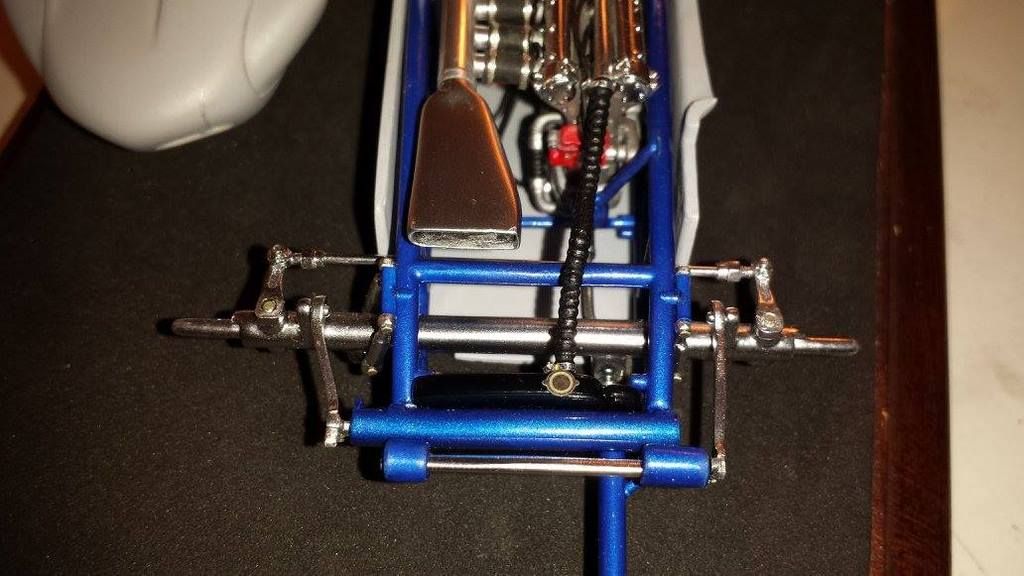 |
|
Deleted
Deleted Member
Posts: 0
|
Post by Deleted on Apr 2, 2016 19:34:18 GMT -5
Next problem to overcome was how to make the seat of the model look like seat on real car. When looking at photos/videos of Parnelli Jones's roadster the seat was upholstered in a silvery/gray vertical stripe material. Here is a picture that was previously posted of Ole Calhoun's seat to give you an idea what I am trying to make.. 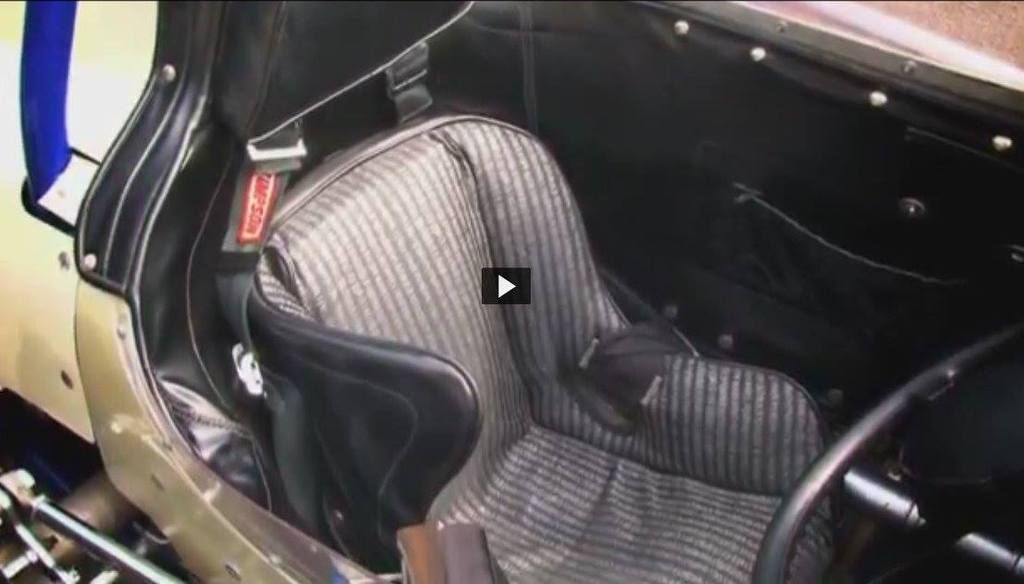 So after checking around... I found some 3M cloth like medical tape called Durapore. This is the style of material that I am looking for. Problem was the vertical stripes run horizontally and you can only get it in 1 inch width in regular stores which was not long enough for what I need. But I did find I could get a 2 inch width through mail order..So $6.00 later I received this 10 ft roll of tape. More that enough to do many cars... 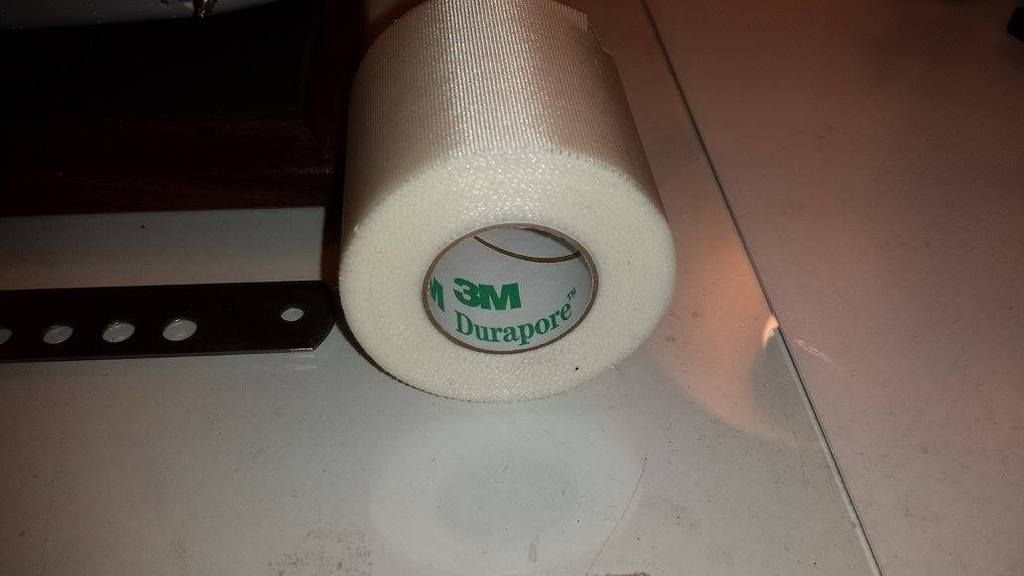 |
|
Deleted
Deleted Member
Posts: 0
|
Post by Deleted on Apr 2, 2016 19:34:52 GMT -5
To get the right color I coated a sheet of the tape with some Tamiya weathering kit Black Soot color. I then cut out some patterns for the seat out of some black paper. My original thought was to put the cut tape directly on the seat. which in the end proved to be too difficult and caused me to have to repaint the seat. So what to do... 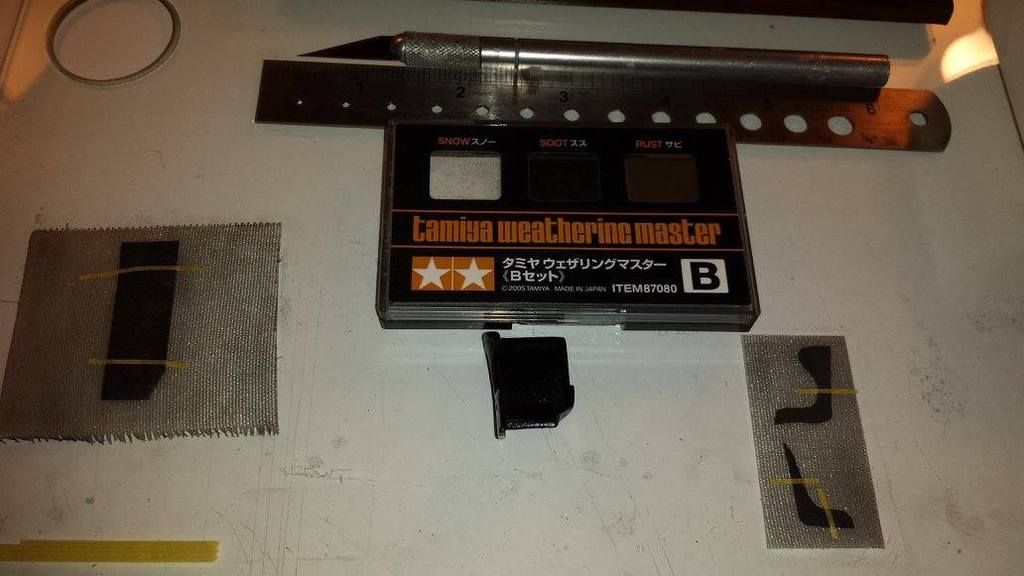 Since I messed up at my first attempt I decided to go with a different method to upholster the seat. So I stripped the paint from the seat and took the patterns I had created before.Then I covered those patterns with the tape and mocked up the fit in the seat. When I was satisfied with the fit I would then repaint seat and then permanently attach the upholstered patterns. With that the paper patterns are covered with the colored tape making sure the pattern on the tape is vertical. 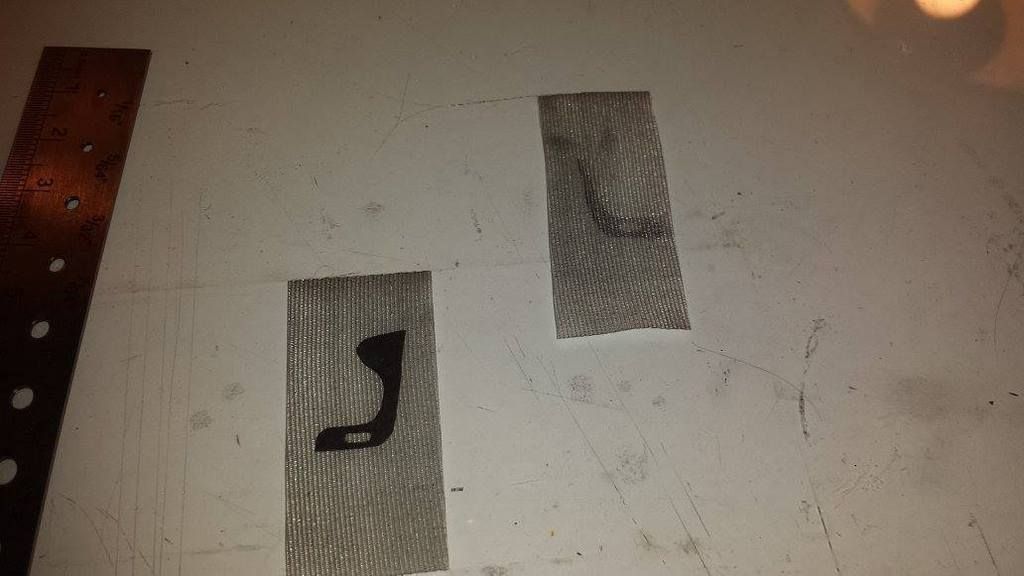 |
|
Deleted
Deleted Member
Posts: 0
|
Post by Deleted on Apr 2, 2016 19:35:27 GMT -5
The paper is upholstered, test fitted to the seat and the seat itself is repainted,, 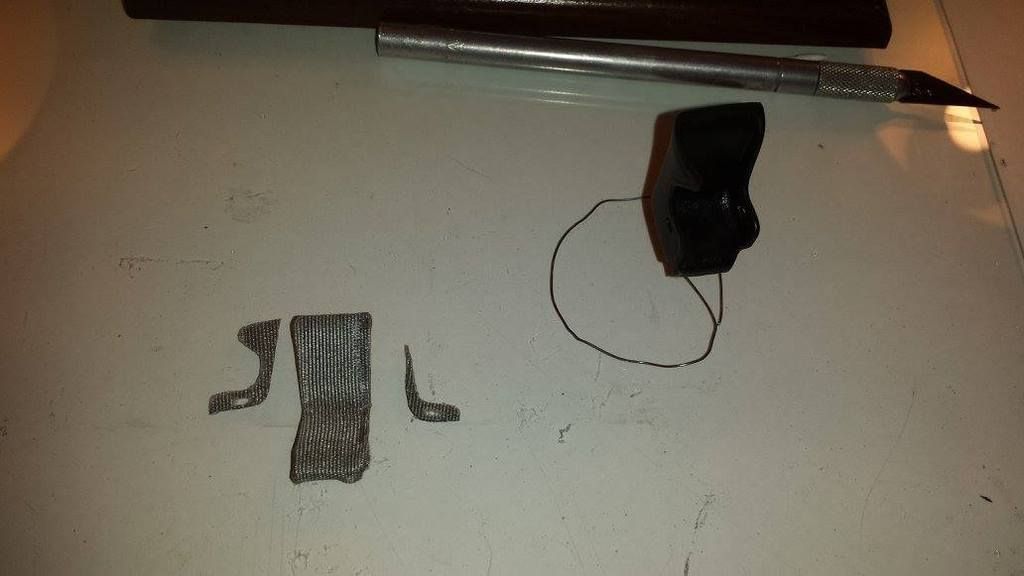 Side bolsters are attached trimmed and the seat is upholstered. 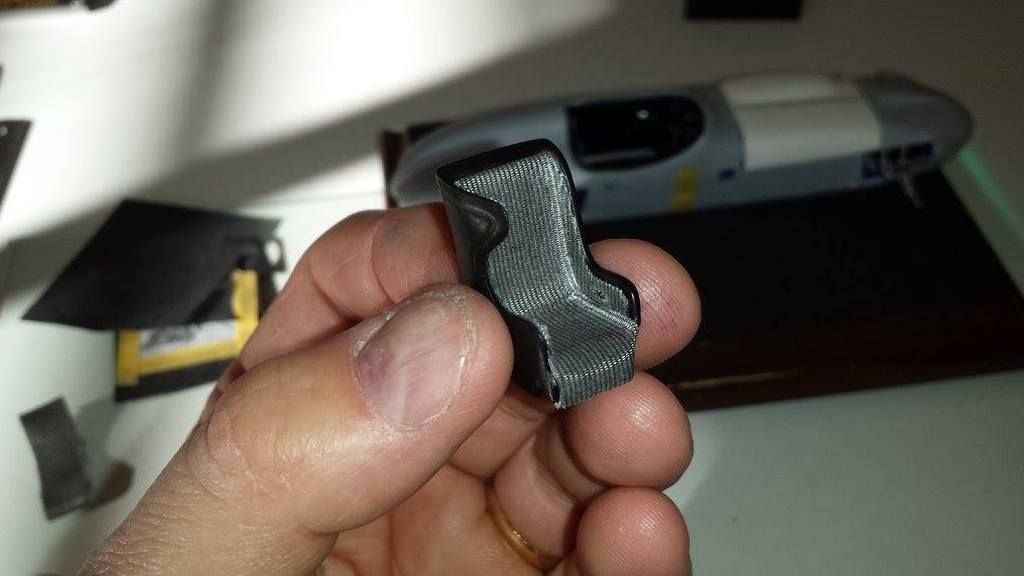 |
|
Deleted
Deleted Member
Posts: 0
|
Post by Deleted on Apr 2, 2016 19:36:17 GMT -5
Now onto the seat belts. I am using lead sheet for the seat belt's themselves and Pro-Tech seat belt kit for the photo-etched seat belt hardware. 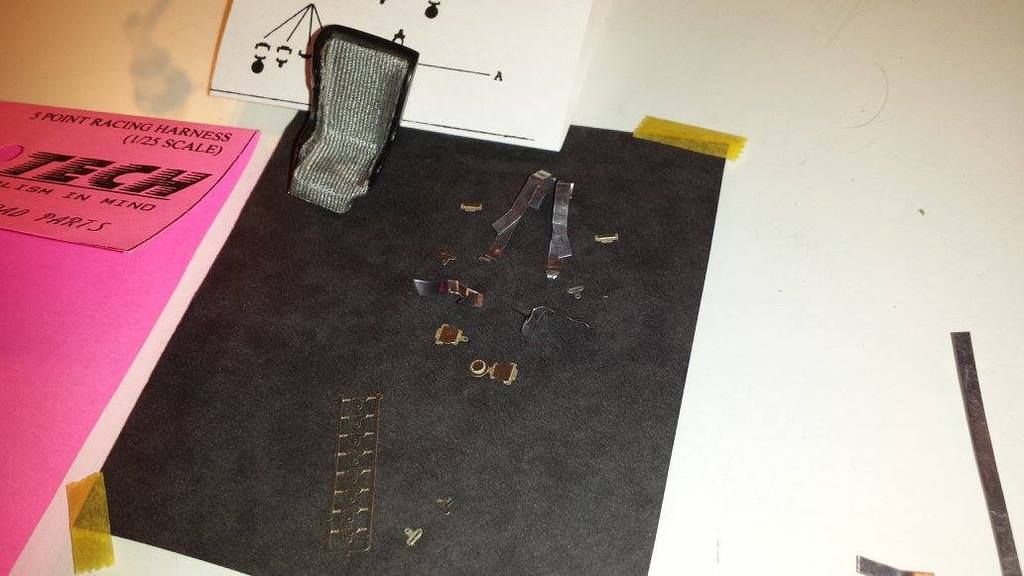 What is nice about using lead sheet it can easily conform to whatever shape you want. so here are all the belts I created prior to painting the Tamiya Semi-Gloss black. 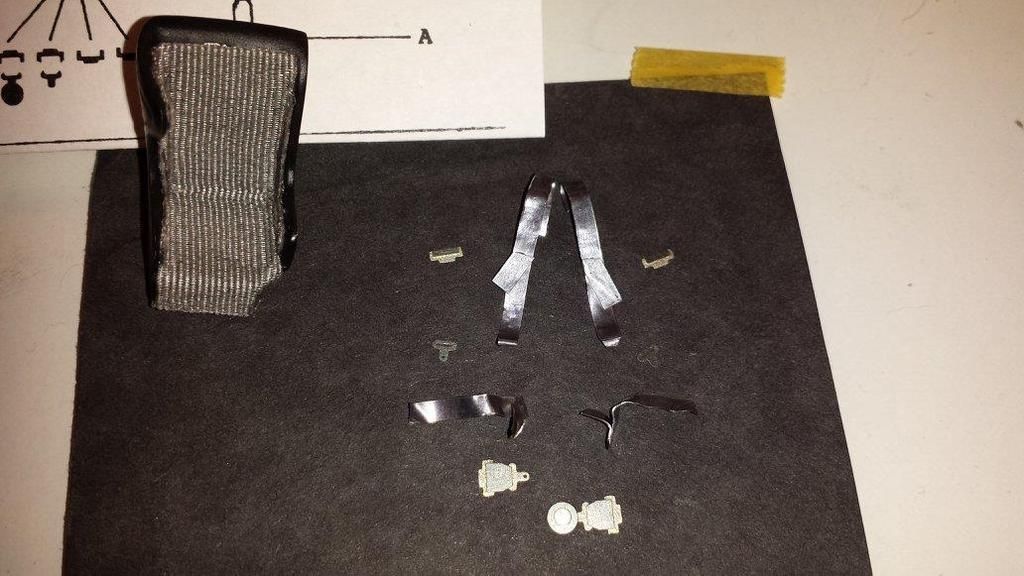 |
|
Deleted
Deleted Member
Posts: 0
|
Post by Deleted on Apr 2, 2016 19:37:14 GMT -5
Belts are painted, lap belts and hardware are attached to the seat. 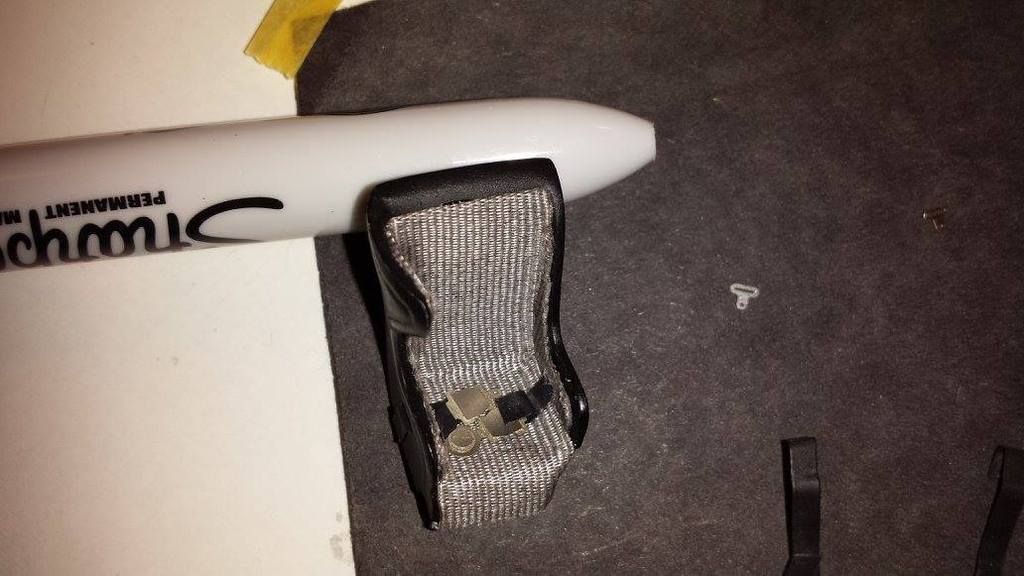 Hardware is attached to the shoulder harnesses. 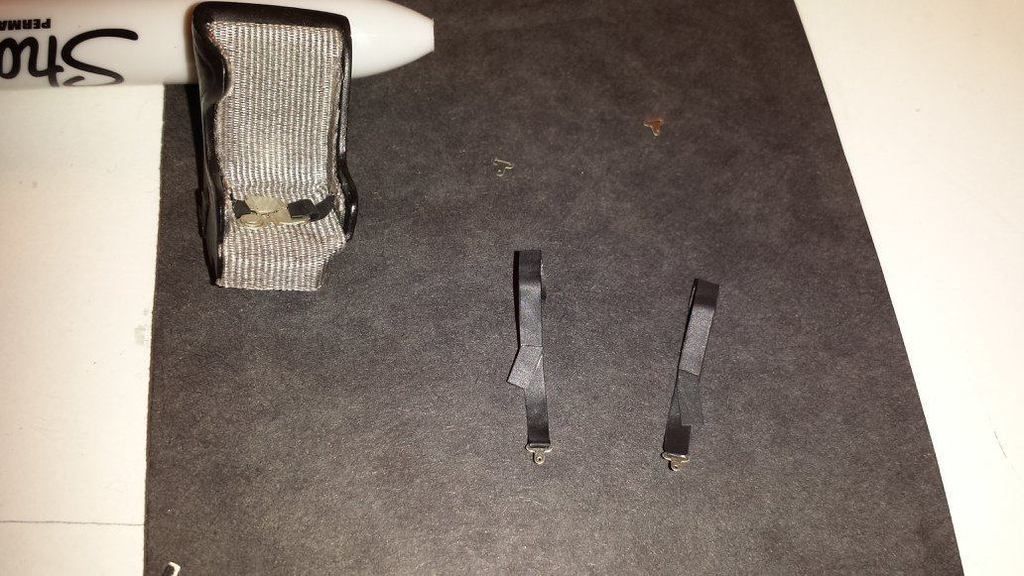 All the belts are attached to the seat. 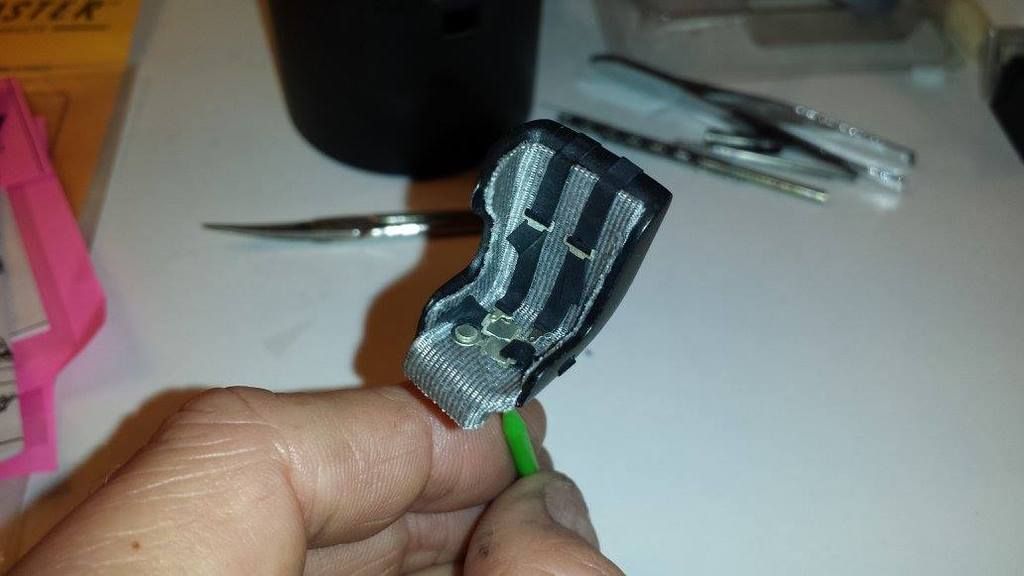 Seat is completed! 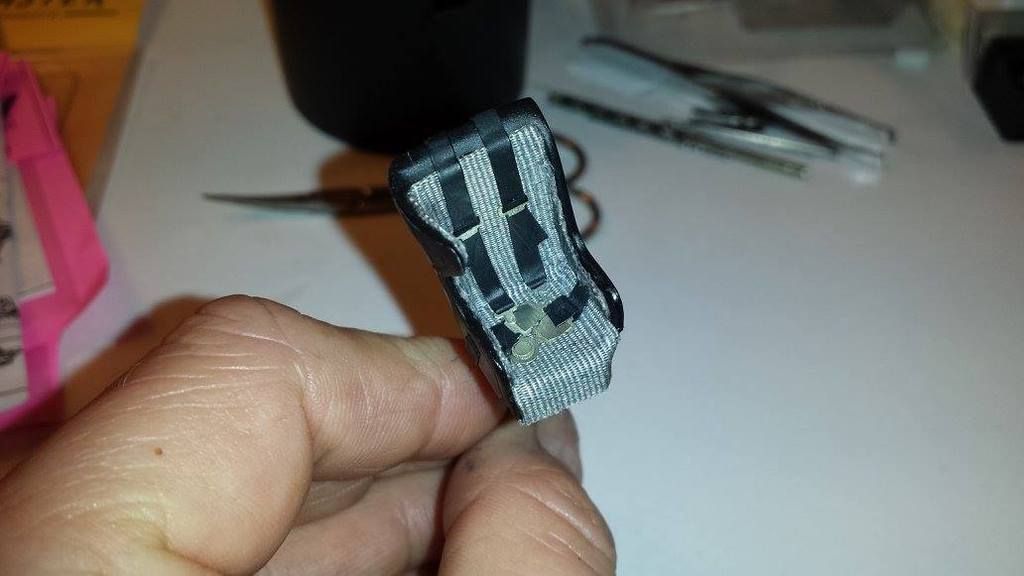 Seat is mocked in the interior 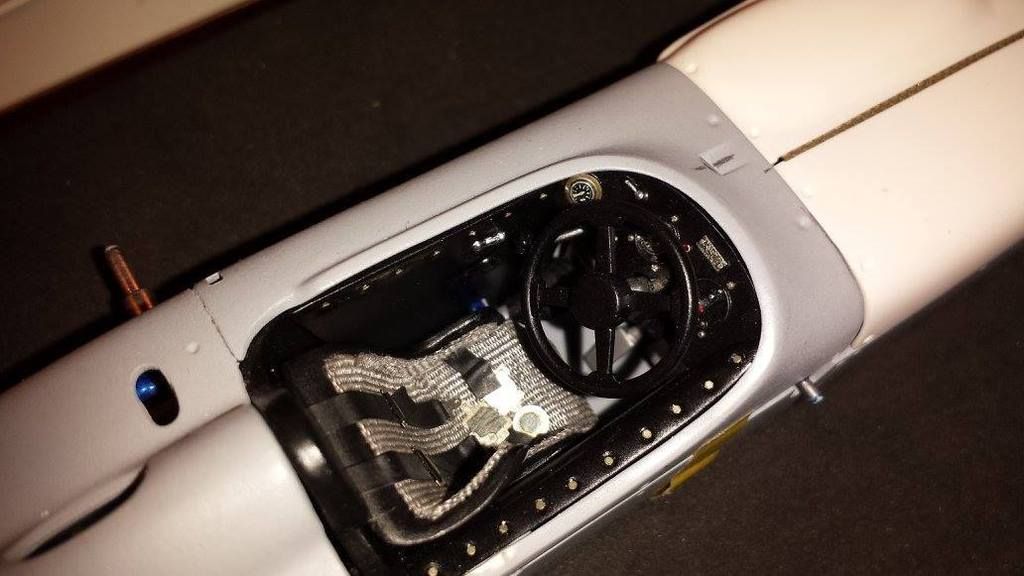 The material on the upholstered seat looks similar to the real car. I'm happy with it. 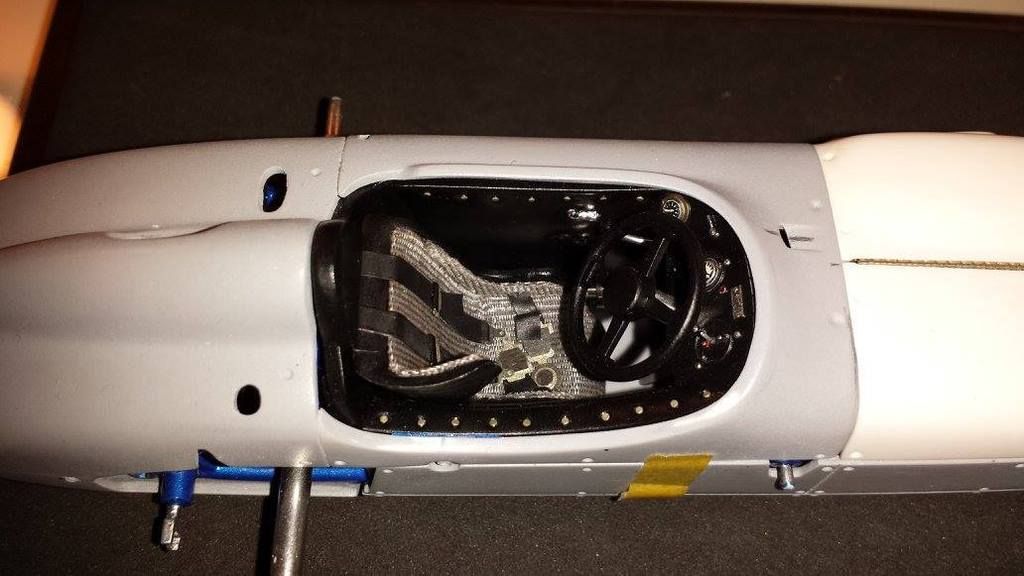 Another View 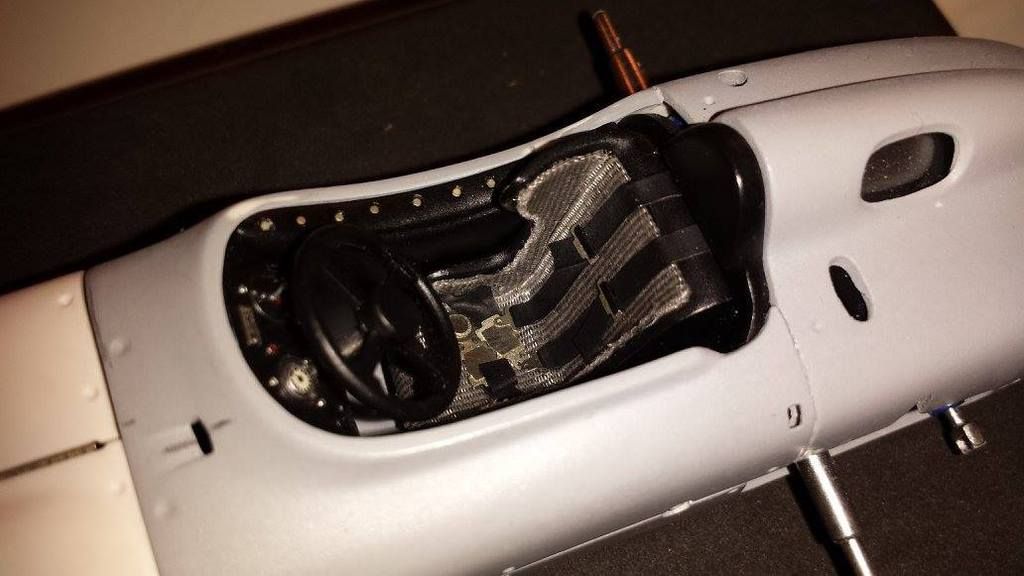 |
|


